Here's part 1 of this blog. Read it to make more sense of Part 2.
http://angjellockheart.blogspot.com/2016/07/new-pedal-board-day-homestyle-edition.html
I ended the last blog with the paint drying. What I didn't know was that, I used paint + primer. So I used two coats, and it turned out fine. I then decorated the board. It turned out like this:
So my next step was to use Velcro and zip ties to hold the Voodoo Labs Power Supply to the underside of the board.
I then added the Velcro to the top side of the board.
Next, I added Velcro to the underside of all my pedals. I laid them out in a pattern that would work. At this part I wish I had a bigger pedal board, but then I wouldn't be able to fit it in my SKB case.
It was at this time I realized that I used a different type of plug for my Snarling Dog's Wah-Wah pedal. On my old SKB board I used different types of connectors than the Voodoo Labs used.
To make a long story short, I talked to a few salesmen at Sam Ash, and they recommended a special 9 volt connector. I check my stash at home, and realized that I had one already. So I tested it out, and it worked on my Wah-wah. So now, I tested everything, and got it working like it should.
Now I have a working pedal board again. My only regret is that I didn't do this sooner. But then again, I didn't know about how to make one. I hope that musicians across the web might take a peek at my blog and be able to make some pedal boards of their own. Good luck out there.
I look at life a bit differently, and like to post my weird thoughts. I like musicial instrument repair and woodworking. For trying to live a somewhat normal life, a lot of weird things happen to me. Instead of putting up with it, I post about it in this blog.
Showing posts with label music woodworking. Show all posts
Wednesday, August 3, 2016
Friday, October 24, 2014
The Bass! Part 4,
Part 1: http://angjellockheart.blogspot.com/2014/10/the-bass-there-are-no-such-things-as.html
Part 2: http://angjellockheart.blogspot.com/2014/10/the-bass-part-2.html
Part 3: http://angjellockheart.blogspot.com/2014/10/the-bass-part-3-punk-rock-bass.html
So I had been waiting on the bridge to arrive, and it finally did.
While it was not an exact replacement of the old one, the saddles lined up just fine. And in the end, that's what's important.
I then had to deal with the pickguard not lining up exactly. However, the use of a long screw took care of a, now, tiny problem.
As you can see, it worked out pretty good. It holds rather nicely.
However then came a problem I did not forsee. This happens with older guitar or bass necks. With no tension on it, the neck is straight. But with the strings at full tension the heal kicks up. So I am torn between having insanely high action, or the frets not being playable from the 12th fret up.
Now, the normal way to correct this is to yank out the frets below the 12th fret, shave the fingerboard, and replace the frets. However, the fingerboard is maple, and if I shave it I will have to re-finish it. Right now, I don't have time for that. I have to make the bass somewhat playable for the next gig.
Once we cross that bridge, I will go back and start work on it. I might be able to shave the frets down, and make it playable. But I'll deal with that when I get there.
I knew I would be a pain to put this thing together, but I didn't think it would be "THIS" much of a pain. I did a lot more work on this thing than I had planned to.
But here's the result. Not too bad.
Part 2: http://angjellockheart.blogspot.com/2014/10/the-bass-part-2.html
Part 3: http://angjellockheart.blogspot.com/2014/10/the-bass-part-3-punk-rock-bass.html
So I had been waiting on the bridge to arrive, and it finally did.
While it was not an exact replacement of the old one, the saddles lined up just fine. And in the end, that's what's important.
I then had to deal with the pickguard not lining up exactly. However, the use of a long screw took care of a, now, tiny problem.
As you can see, it worked out pretty good. It holds rather nicely.
However then came a problem I did not forsee. This happens with older guitar or bass necks. With no tension on it, the neck is straight. But with the strings at full tension the heal kicks up. So I am torn between having insanely high action, or the frets not being playable from the 12th fret up.
Now, the normal way to correct this is to yank out the frets below the 12th fret, shave the fingerboard, and replace the frets. However, the fingerboard is maple, and if I shave it I will have to re-finish it. Right now, I don't have time for that. I have to make the bass somewhat playable for the next gig.
Once we cross that bridge, I will go back and start work on it. I might be able to shave the frets down, and make it playable. But I'll deal with that when I get there.
I knew I would be a pain to put this thing together, but I didn't think it would be "THIS" much of a pain. I did a lot more work on this thing than I had planned to.
But here's the result. Not too bad.
Labels:
80's,
Bass,
bass guitar,
Cort,
Dragonfire,
EMG,
Guitar,
guitar repair,
luthier,
luthiery,
Music,
music woodworking,
musicians,
parts,
pickups,
punk rock,
repair
Location:
Lutz, FL, USA
Sunday, October 19, 2014
The Bass! Part 3, Punk Rock Bass
Part 1: http://angjellockheart.blogspot.com/2014/10/the-bass-there-are-no-such-things-as.html
Part 2: http://angjellockheart.blogspot.com/2014/10/the-bass-part-2.html
So I have been having problems with the wiring. Seriously, I've been working something like a week on it. But instead of making a long story out of it, I'll just say this. It seems one of the volume pots was bad, and not sending enough signal through to the tone pot. That's why I couldn't get the tone pot to work.
I do want to say now that the volume is LOUD!!! Now that I have a proper working volume pot, it's surprising just how loud these Dragonfire active pickups are. I can't wait to get strings on this bass.
And simply put, I yanked out everything, and started with all new parts.
So after getting all the electronics working, I made holes for all the screws, and fitted the pickguard and output jack.
Even though I don't have the bridge yet, I used my straight edge to get a proper angle on how I should shim the neck. I used a rather thick piece of wood, and shimmed it. It came out exactly how I wanted. I may have to adjust it further once I get the bridge in, but it's a good start.
So onto the pictures!!!
So the bass looks very worn and punk rock to me. It was a great bass to get some practice in on a few things. More to come when I get the bridge in the mail, and get the bass finally set up.
Part 2: http://angjellockheart.blogspot.com/2014/10/the-bass-part-2.html
So I have been having problems with the wiring. Seriously, I've been working something like a week on it. But instead of making a long story out of it, I'll just say this. It seems one of the volume pots was bad, and not sending enough signal through to the tone pot. That's why I couldn't get the tone pot to work.
I do want to say now that the volume is LOUD!!! Now that I have a proper working volume pot, it's surprising just how loud these Dragonfire active pickups are. I can't wait to get strings on this bass.
And simply put, I yanked out everything, and started with all new parts.
So after getting all the electronics working, I made holes for all the screws, and fitted the pickguard and output jack.
Even though I don't have the bridge yet, I used my straight edge to get a proper angle on how I should shim the neck. I used a rather thick piece of wood, and shimmed it. It came out exactly how I wanted. I may have to adjust it further once I get the bridge in, but it's a good start.
So onto the pictures!!!
So the bass looks very worn and punk rock to me. It was a great bass to get some practice in on a few things. More to come when I get the bridge in the mail, and get the bass finally set up.
Labels:
80's,
antique,
Bass,
bass guitar,
Cort,
Dragonfire,
EMG,
Guitar,
luthier,
luthiery,
Music,
music woodworking,
musicians,
parts,
pickup,
punk rock,
repair
Location:
Lutz, FL, USA
Tuesday, October 14, 2014
The Bass! Part 2
Here's part 1. It might make more sense to read it first.
http://angjellockheart.blogspot.com/2014/10/the-bass-there-are-no-such-things-as.html
So I am trying to get this bass up and running. It's not as simple as putting parts together. There are so many things I'm having to adjust, sand, cut, and rig, just to get it to somewhat work together.
First up, let me show some pictures so everyone knows what I am talking about.
Let's go over what I'm talking about.
1. I had to cut some foam to put under the pickups. I then had to drill the screw holes even longer so the screws could go in.
2. I had to adjust the pickguard even more to get those P-Bass pickups to fit in. It was a lot of sanding and such. Just a lot of what I have been doing.
3. I just did away with the pots that came with the Dragonfire pickups. I have a whole box of EMG pots, so I used them. They are mini-pots so I can use them without having to route out part of the body.
4. Speaking of routing... I routed the body so the pickups would fit better. I also routed the pickguard so I can fit it in the truss rod hex adjuster.
Frankly, it's just a lot of nipping things in the bud here and there. Again, universal parts are not universal!
Up next is wiring the active pickups. This is kind of funny, but Dragonfire didn't include a wiring diagram. Usually I can do these without looking at a diagram, but I haven't done an active set in a while. So I downloaded the EMG diagram. Since these pickups are supposed to be a copy of them, I decided to just go right to the source.
After that, I will get the neck on there, and wait for the bridge to come in the mail. That, of course, means more blogging. Keep posted.
http://angjellockheart.blogspot.com/2014/10/the-bass-there-are-no-such-things-as.html
So I am trying to get this bass up and running. It's not as simple as putting parts together. There are so many things I'm having to adjust, sand, cut, and rig, just to get it to somewhat work together.
First up, let me show some pictures so everyone knows what I am talking about.
Let's go over what I'm talking about.
1. I had to cut some foam to put under the pickups. I then had to drill the screw holes even longer so the screws could go in.
2. I had to adjust the pickguard even more to get those P-Bass pickups to fit in. It was a lot of sanding and such. Just a lot of what I have been doing.
3. I just did away with the pots that came with the Dragonfire pickups. I have a whole box of EMG pots, so I used them. They are mini-pots so I can use them without having to route out part of the body.
4. Speaking of routing... I routed the body so the pickups would fit better. I also routed the pickguard so I can fit it in the truss rod hex adjuster.
Frankly, it's just a lot of nipping things in the bud here and there. Again, universal parts are not universal!
Up next is wiring the active pickups. This is kind of funny, but Dragonfire didn't include a wiring diagram. Usually I can do these without looking at a diagram, but I haven't done an active set in a while. So I downloaded the EMG diagram. Since these pickups are supposed to be a copy of them, I decided to just go right to the source.
After that, I will get the neck on there, and wait for the bridge to come in the mail. That, of course, means more blogging. Keep posted.
Labels:
Bass,
bass guitar,
Dragonfire,
EMG,
Guitar,
luthier,
music woodworking,
pickups,
work
Location:
Lutz, FL, USA
Monday, September 15, 2014
Project 7, Part 2, Dusty Beginnings
Here's Part 1: http://angjellockheart.blogspot.com/2014/08/project-7-project-to-end-all-projects.html
I have made quite a bit of progress so far. More so than I would have thought. So I will write about my progress along with the pictures I have taken.
First up is the three piece neck. You really waste a lot of wood cutting a neck out this way, but it's insanely strong, and will last forever.
That's all I can do on the neck for the time being. I have to route a line down it for the truss rod next.
Next, I thought I would take a picture of the cut out neck and body. The next step on the body is to route out places on it. That's why it's only half cut out.
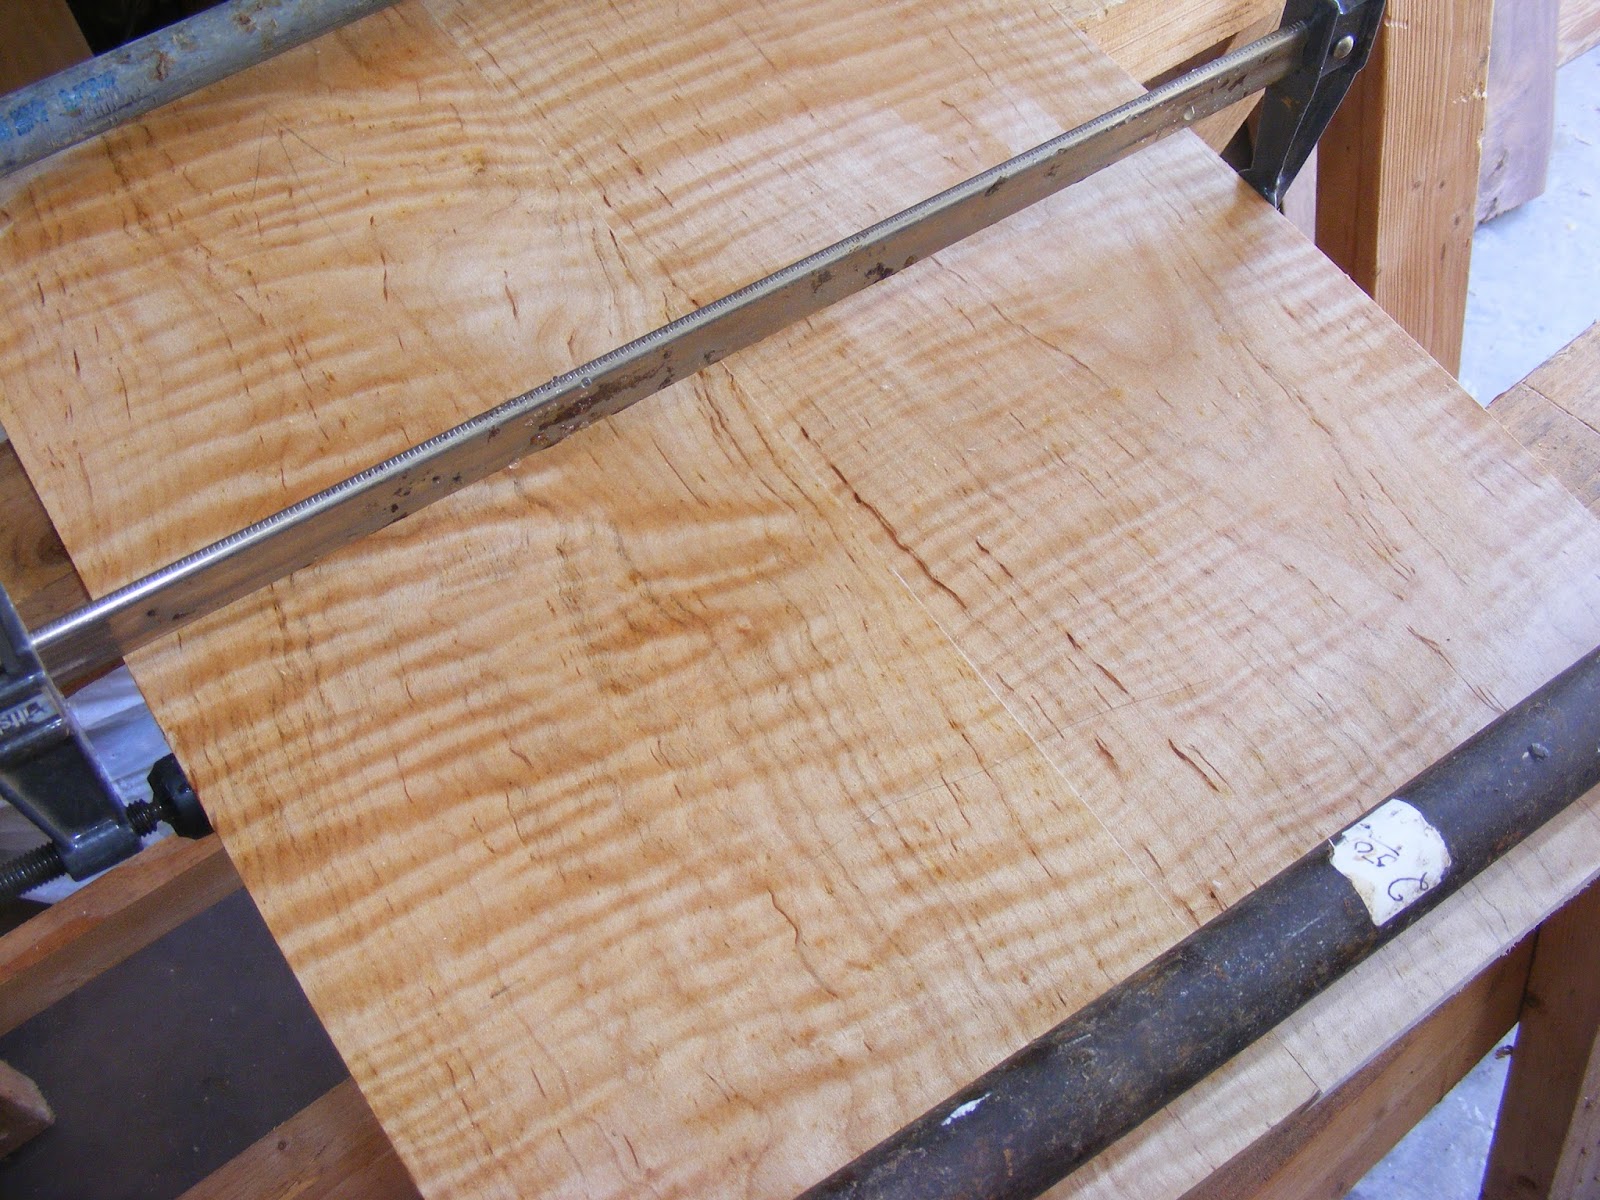
The next step was to start gluing the top together. I was going to use this awesome piece of bookmatched rosewood. However, after searching for a week, I couldn't find it. So I gave up and decided to use this awesome piece of maple I've had for a few years.
So it glued up nicely. Here's what it looked like when I cut it out.
Here are the top and bottom of the body pictured together.
Here is the black walnut with some water on it to make the grain "pop."
With wood, you sometimes don't know what you have until you cut and sand it out. I think I lucked out with these pieces.
Next up was cutting out the control cavities. I'm 90% there. I honestly, just need more sandpaper for my spindal sander.
So next up I will doing more routing on the body. And once I get some sandpaper I will be enlarging the holes to where they should be.
I have made quite a bit of progress so far. More so than I would have thought. So I will write about my progress along with the pictures I have taken.
First up is the three piece neck. You really waste a lot of wood cutting a neck out this way, but it's insanely strong, and will last forever.
That's all I can do on the neck for the time being. I have to route a line down it for the truss rod next.
Next, I thought I would take a picture of the cut out neck and body. The next step on the body is to route out places on it. That's why it's only half cut out.
The next step was to start gluing the top together. I was going to use this awesome piece of bookmatched rosewood. However, after searching for a week, I couldn't find it. So I gave up and decided to use this awesome piece of maple I've had for a few years.
So it glued up nicely. Here's what it looked like when I cut it out.
Here's what the flame maple looks like when you put a little water on it. It makes the grain "pop" out more.
Here are the top and bottom of the body pictured together.
Here is the black walnut with some water on it to make the grain "pop."
With wood, you sometimes don't know what you have until you cut and sand it out. I think I lucked out with these pieces.
Next up was cutting out the control cavities. I'm 90% there. I honestly, just need more sandpaper for my spindal sander.
So next up I will doing more routing on the body. And once I get some sandpaper I will be enlarging the holes to where they should be.
Thursday, August 7, 2014
Black Walnut Acquisition Day
So when I was in West Virginia on vacation, Dad and I went to see this guy about some wood. It turns out the guy had bought out a barn of the stuff, and was selling it at very good/great prices.
Wood buyers have very different wants when it comes to wood. As a luthier, I am looking for very straight grained wood with no knots. Wood turners want the pieces where a limb joins up with the body of a tree. And some builders like highly figured wood with knots.
However, for guitar building I can see why some builders will only take 1 in 100 pieces. I went through this seller's entire stack of black walnut and came away with 5 pieces of wood. When I bought the wood, it was still rough sawn, so I'm not sure how good it was going to be.
Today I laid out the wood for planning. Here's what I bought.
As you can see, it was kind of a crapshoot. For $20 I couldn't complain. I figured I had enough wood for one Les Paul type of guitar. Here's what I got after I planned the wood.
Again, very clean grained wood, with no figure in it. There are some places I will have to cut around, but I can say with certainty that I will be able to get one guitar out of it. I know it looks very light colored in the pictures, but once I add water or finish to it, the wood will darken up. This wood is extremely dry so I can start working on it right away.
I will continue to update as my project progresses. I know what I hope to do with this project, but we'll see how it actually turns out.
Wood buyers have very different wants when it comes to wood. As a luthier, I am looking for very straight grained wood with no knots. Wood turners want the pieces where a limb joins up with the body of a tree. And some builders like highly figured wood with knots.
However, for guitar building I can see why some builders will only take 1 in 100 pieces. I went through this seller's entire stack of black walnut and came away with 5 pieces of wood. When I bought the wood, it was still rough sawn, so I'm not sure how good it was going to be.
Today I laid out the wood for planning. Here's what I bought.
As you can see, it was kind of a crapshoot. For $20 I couldn't complain. I figured I had enough wood for one Les Paul type of guitar. Here's what I got after I planned the wood.
Again, very clean grained wood, with no figure in it. There are some places I will have to cut around, but I can say with certainty that I will be able to get one guitar out of it. I know it looks very light colored in the pictures, but once I add water or finish to it, the wood will darken up. This wood is extremely dry so I can start working on it right away.
I will continue to update as my project progresses. I know what I hope to do with this project, but we'll see how it actually turns out.
Wednesday, May 29, 2013
Repairing Josh's Guitar, Part 2
For Part 1, read this:
http://angjellockheart.blogspot.com/2013/05/repairing-joshs-guitar-part-1.html
I'll start from where I left off last time. Basically I had glued the guitar's neck back together, and had sanded the rough cracks even. I had added stain and the first coat of wipe on polyurethane.
My next steps where just adding wipe on poly once a day for a number of days. Once I had done that I decided to buff out the neck on my buffing machine. Here's the pictures from that.
I have to say that I am pretty happy with that. I wasn't sure how it was going to come out. Honestly, I have to say this was my best work on a cracked neck. But truthfully, no two cracked guitar necks are the same. But I was able to get this repaired, and the truss rod still works fine. That's a giant relief.
So next was making the bone nut. Since Josh had lost the original plastic nut, I had to build him a new one. I won't go over step by step on how I made it. Only know that I put a good amount of time into it. I hadn't made a bone nut in years, and there is a real art to it. You can put a lot of time and effort into making one, and despite your best efforts it can come out like crap. Like I said, there is a real art to it.
But I'm glad to say it came out great. Here are the pictures of me making it.
If you wonder what the black marks are, those are graphite from a pencil. It helps slicken the grooves so the strings slide easier.
Next up was double checking how the poly on the back of the neck had dried.
I gotta say, I am really pleased with how the guitar came out. I set it up, and it plays really nice. Now let's hope that Josh won't do something else dangerous to this guitar.
http://angjellockheart.blogspot.com/2013/05/repairing-joshs-guitar-part-1.html
I'll start from where I left off last time. Basically I had glued the guitar's neck back together, and had sanded the rough cracks even. I had added stain and the first coat of wipe on polyurethane.
My next steps where just adding wipe on poly once a day for a number of days. Once I had done that I decided to buff out the neck on my buffing machine. Here's the pictures from that.
I have to say that I am pretty happy with that. I wasn't sure how it was going to come out. Honestly, I have to say this was my best work on a cracked neck. But truthfully, no two cracked guitar necks are the same. But I was able to get this repaired, and the truss rod still works fine. That's a giant relief.
So next was making the bone nut. Since Josh had lost the original plastic nut, I had to build him a new one. I won't go over step by step on how I made it. Only know that I put a good amount of time into it. I hadn't made a bone nut in years, and there is a real art to it. You can put a lot of time and effort into making one, and despite your best efforts it can come out like crap. Like I said, there is a real art to it.
But I'm glad to say it came out great. Here are the pictures of me making it.
If you wonder what the black marks are, those are graphite from a pencil. It helps slicken the grooves so the strings slide easier.
Next up was double checking how the poly on the back of the neck had dried.
I gotta say, I am really pleased with how the guitar came out. I set it up, and it plays really nice. Now let's hope that Josh won't do something else dangerous to this guitar.
Labels:
art,
artist,
Dean Guitars,
Guitar,
guitar repair,
guitars,
luthier,
luthiery,
Music,
music woodworking,
musicians,
wood,
woodwork,
woodworking
Location:
Lutz, FL, USA
Subscribe to:
Posts (Atom)