I have written a number of blog posts about my favorite guitar pedal company Biyang. They are a family company located in China that builds high quality guitar pedals for much less than other brands.
For those who don't know, Biyang also ghost-builds guitar pedals for other companies. All the Guitar Fetish pedals? Yep, those are built by Biyang. The high end Akai pedals that go for $150? Those are just rebranded Biyang pedals. They have the exact same components and wiring that the original Biyang pedals do. Only the Akai pedals cost three times as much.
Biyang also makes pedals for Cordovox. In fact, they don't even change the look or model names for them. They just put Cordovox instead of Biyang on the pedal. So you can see my point, in that, Biyang is a dang good company, and you might be playing one of their pedals and not know it.
For the last year I had been reading up on the Rat Pro Co pedal. It's famous for that 80's metal sound. But it has many uses. I mean, Blur's well known song, "Song 2" is a perfect example of the Rat Pro Co. So it's not like the Rat is only designed for hair metal.
Biyang is known for using specs of other manufacturer's pedals, building with high end German parts, and coming out with a clone version of those pedals. I was really interested in their version of the Rat. Well, lo and behold, they have the "Biyang Mouse DS-8."
Unfortunately, unlike a lot of their other pedals, I hadn't heard good things about this one. I guess it was so poorly liked, they took it off the market. This made things a bit rough for me since I couldn't find one available in the states. But then, I got to thinking. Remember what I said about them building pedals for other manufactures?
Biyang made two versions of their pedals for themselves. The Tonefancier series was encased in a chrome housing. They would then make a second, more colorful version of that pedal. So I started looking around.
I found a new-oldstock Biyang Distortion pedal on Reverb.com. I thought to myself, "That's got to be the same pedal as the "Mouse." I read up on the description, and it was the same as the Mouse. So I pulled the trigger, and bought one.
But I also had a plan. You see, in my research I came across a guitar forum user named "11 Gauge." Note: That refers to a wire size, not a shotgun. He talked about the Mouse, and how it was virtually the same as a Rat except for one thing. They had installed a 56K ohm resistor where they should have installed a 560 ohm resistor. Here's his photo:
So when my Biyang Distortion pedal arrived I tested I immediately tested it out. I had to agree with the reviews. It just wasn't that great sounding.
So I took it apart, and checked the circuit. Guess what? It was exactly the same as the Mouse. Exactly. Also, it had the same flaw as the Mouse. It had that stupid 56K ohm resistor instead of a 560 ohm resistor.
Long story short, I bought a pack of 10 resistors so I could use one. I took my sweet time, and changed out the incorrect resistor as per 11 Gauge's instructions.
I tested it out on the bench, and I have to say I noticed a few things. First up, it had a lot more usable gain. You could get that super crunchy gain if you wanted, but you could also get a slight breakup if that was the sound you were after. The other thing I noticed was the three way switch was more effective.
It has three modes: (from top to bottom) Normal, Bright, Warm. I always kept it on Bright. The other two settings just cut the volume. I didn't really notice any difference in sound on Normal or Warm. Once I changed the resistor I did notice a bit of difference to the sound. It still dropped the volume, but it wasn't as bad as it was.
I'll be honest, if I knew more about electronics I would just take the three way switch out. I don't think it adds anything. Honestly, I think it takes away more than it gives. But that's just my thoughts.
I haven't had a chance to play around with it as much as I would like, but I was happy with the sound when I did play it. I'm looking forward to hearing how it sounds with single coils, vintage humbuckers, hot pickups, and active pickups. Again, like I tell other players, "Just have fun with it." And that's what I'm going to do. I'm going to have fun with it.
I look at life a bit differently, and like to post my weird thoughts. I like musicial instrument repair and woodworking. For trying to live a somewhat normal life, a lot of weird things happen to me. Instead of putting up with it, I post about it in this blog.
Showing posts with label guitar repair. Show all posts
Sunday, October 27, 2019
New Pedal Day: Tinkering With A Mouse So It Becomes A Rat!
Labels:
Biyang,
Guitar,
guitar repair,
Mouse,
Music,
pedal,
Rat,
Rat Pro Co,
repair,
Resistor,
Soldering,
Sound,
Tinkering
Location:
Lutz, FL, USA
Tuesday, May 8, 2018
Straturday Upgrade: A New Neck For An Amazing Guitar.
I have to say, I'm really proud of the first guitar I ever put together. But to be honest, a lot of other people did a lot of the work. That's why I say I "put it together" and not, "built it." I went all out on it. It had an insane paint job. I've had a few different pickups in it, but they have always been top notch. All the parts from the locking tuners to the real Schaller made Floyd Rose, even the knobs were all top notch. Back when I put it together (around the year 2000) my total cost (including case) was $1,080.00.
So I'm sure you're wondering, "Well, why the ever-loving hell would I upgrade it some more?" The truth is I've never really been happy with the neck. There's a few reasons why.
1. The nut width for my Floyd Rose locking nut is 43mm. The nut width on this neck is 42mm. So the locking nut hangs over the side of the neck.
2. The neck shape is closer to a Les Paul 59' shape instead of a Fender Strat shape. It was like holding the end of a baseball bat. Honestly, that bothered me more than anything. It made it very difficult to play compared to my other guitars.
3. The old neck was only 21 frets. This new one I ordered is 22 frets like an American Strat.
4. The new neck is a satin finish. The old was had so much high gloss on it, it gave the neck a sort of sticky finish.
5. When I first bought the neck I was apprenticing under a master luthier. I fret-dressed the frets a little too much so there wasn't much fret-life left. Eventually I was going to have to re-fret the neck.
The one drawback I did have against changing necks was the matching headstock. I really dig the matching headstock on the old neck. But now that I have new logos I felt okay on pulling the trigger to change necks.
So first things first. I put the logo on, and gave it time to dry. Next, I fret-dressed the neck. All the frets were pretty even except for one. I know, just one dang fret screws it all up right? Now that I have almost 20 years of luthiery experience I am much better at fret-dressing. This time I kept it extremely light, and only took off what I had to. (Like I do with all guitars nowadays.)
The one thing that did concern me was that the frets were cut really easily with my fretting file. That meant they used softer metal than a lot of companies. If I played one guitar all the time I would have just gone ahead and re-fretted it right there. But since I'm always switching up guitars, it will be years before I have to fret-dress it again, and years after that before I have to re-fret it.
So here's the neck post-fret-dress:
Next, I moved over all the neck hardware.
After that it was time to install the neck. I have my own method of putting one on so that it lines up properly. It's a bit technical so I won't bore anyone with the details. Let's just say, it went on perfectly. Namely, because it went on exactly 100% perfectly. I have to say, I'm really happy with myself.
Next it was all a matter of setting it up properly. We'll skip the details and head straight to the pics.
I am ecstatic with how it turned out. She plays so much better now. Hopefully I will take her out of her case a little bit more. Due to the amount of money I spent assembling her I was always hesitant to take her out to play a gig. It's a guitar player's dilemma. Once you finally manage to buy nice equipment, you are scared to take such nice equipment out for fear that it will be stolen.
There was one difference on the new neck that helped with one thing, but hurt another. The previous neck was much thicker at the heal. That meant I had to put the pickups up high so they would be positioned correctly. It was difficult for my middle (Strat) pickup to reach the correct height.
The new neck is thinner, so I can adjust the pickups easier. The thinner neck did create a problem I did not anticipate. Since the neck sat lower, I had to lower the posts for the Floyd Rose tremolo. After tuning up I pulled back on the Floyd only to find that it didn't have the clearance it had before. So in essence, I gained the ability to adjust the pickups correctly, but I gave up being able to pull back on the Floyd Rose tremolo as much as I previously could.
Overall I am really happy that I changed out the neck. I wish I had set it up like this years ago. I have to remember that there are so many items available on the internet now that weren't available back when I put this guitar together. So I can't be too hard on myself. All I can do is play my heart out. And I plan on doing just that. Keep rockin' on everyone.
So I'm sure you're wondering, "Well, why the ever-loving hell would I upgrade it some more?" The truth is I've never really been happy with the neck. There's a few reasons why.
1. The nut width for my Floyd Rose locking nut is 43mm. The nut width on this neck is 42mm. So the locking nut hangs over the side of the neck.
2. The neck shape is closer to a Les Paul 59' shape instead of a Fender Strat shape. It was like holding the end of a baseball bat. Honestly, that bothered me more than anything. It made it very difficult to play compared to my other guitars.
3. The old neck was only 21 frets. This new one I ordered is 22 frets like an American Strat.
4. The new neck is a satin finish. The old was had so much high gloss on it, it gave the neck a sort of sticky finish.
5. When I first bought the neck I was apprenticing under a master luthier. I fret-dressed the frets a little too much so there wasn't much fret-life left. Eventually I was going to have to re-fret the neck.
The one drawback I did have against changing necks was the matching headstock. I really dig the matching headstock on the old neck. But now that I have new logos I felt okay on pulling the trigger to change necks.
So first things first. I put the logo on, and gave it time to dry. Next, I fret-dressed the neck. All the frets were pretty even except for one. I know, just one dang fret screws it all up right? Now that I have almost 20 years of luthiery experience I am much better at fret-dressing. This time I kept it extremely light, and only took off what I had to. (Like I do with all guitars nowadays.)
The one thing that did concern me was that the frets were cut really easily with my fretting file. That meant they used softer metal than a lot of companies. If I played one guitar all the time I would have just gone ahead and re-fretted it right there. But since I'm always switching up guitars, it will be years before I have to fret-dress it again, and years after that before I have to re-fret it.
So here's the neck post-fret-dress:
Next, I moved over all the neck hardware.
Next it was all a matter of setting it up properly. We'll skip the details and head straight to the pics.
I am ecstatic with how it turned out. She plays so much better now. Hopefully I will take her out of her case a little bit more. Due to the amount of money I spent assembling her I was always hesitant to take her out to play a gig. It's a guitar player's dilemma. Once you finally manage to buy nice equipment, you are scared to take such nice equipment out for fear that it will be stolen.
There was one difference on the new neck that helped with one thing, but hurt another. The previous neck was much thicker at the heal. That meant I had to put the pickups up high so they would be positioned correctly. It was difficult for my middle (Strat) pickup to reach the correct height.
The new neck is thinner, so I can adjust the pickups easier. The thinner neck did create a problem I did not anticipate. Since the neck sat lower, I had to lower the posts for the Floyd Rose tremolo. After tuning up I pulled back on the Floyd only to find that it didn't have the clearance it had before. So in essence, I gained the ability to adjust the pickups correctly, but I gave up being able to pull back on the Floyd Rose tremolo as much as I previously could.
Overall I am really happy that I changed out the neck. I wish I had set it up like this years ago. I have to remember that there are so many items available on the internet now that weren't available back when I put this guitar together. So I can't be too hard on myself. All I can do is play my heart out. And I plan on doing just that. Keep rockin' on everyone.
Location:
Lutz, FL, USA
Saturday, August 6, 2016
New Bass Day: My First Schecter
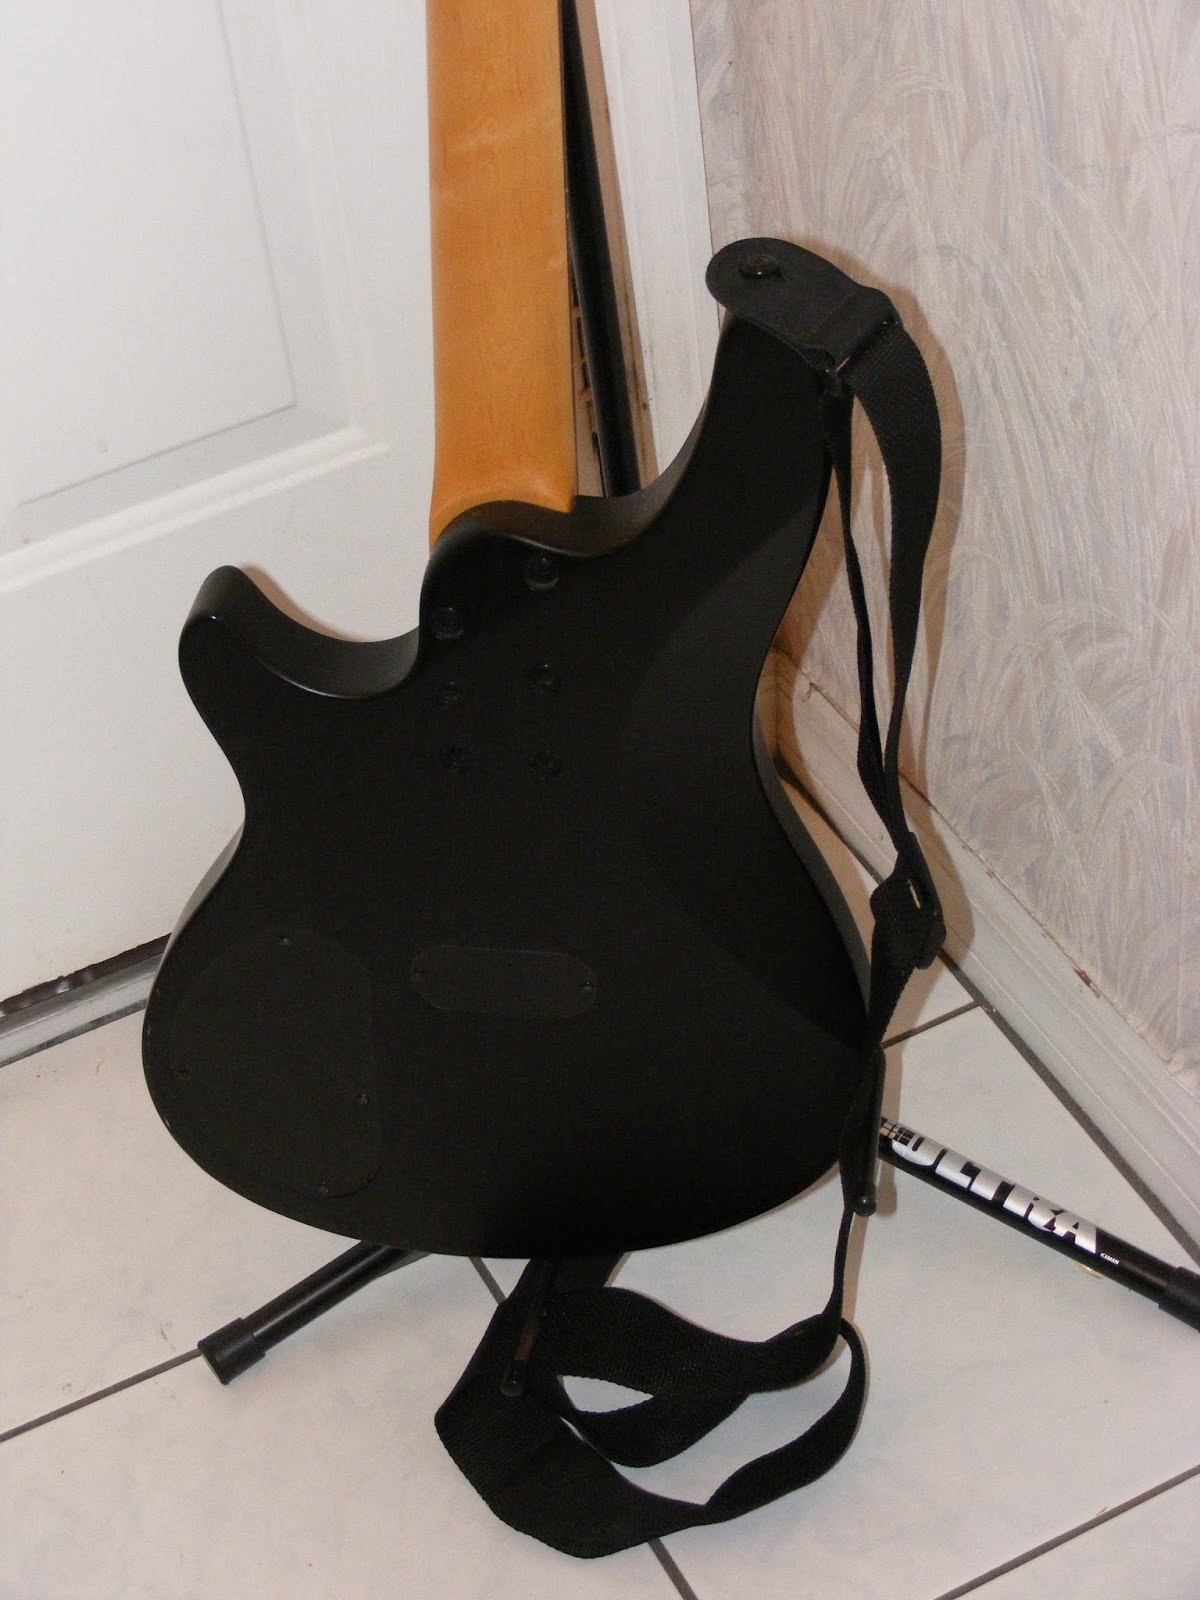
Today has been a good day. After hounding a guy for (today included) three days I have a new bass. Despite having upteen guitars in my lifetime, I have only had four (including this one) basses in my life.
Here's the story. I was checking late at night on Craigslist, and saw a listing that simply said, "Bass Guitar - $120." So I clicked on it. After checking reading the ad, I had to do some research. He didn't actually list what kind of bass it was. I could see the Schecter logo on the headstock, but I had to blow up the image to see the model it was. It was a Damien 4.
I saw that they weren't made anymore, but when they were new they cost $550 new. On the used market they were going for $250 to $350. So this was a good deal.... maybe.
I still had to check it out. I admit, I broke a couple of my own rules in buying this bass. The guy had been given the bass to him for his son to try out. His son didn't like it, and it sat unplayed for a quite a while. So when I checked it out I noticed the neck was pretty bowed. But I ended up getting "Luthier muscles" and thought, "I can fix anything!!!!!"
So I met the guy in a Walgreens parking lot. This also broke another rule in that, I didn't test the bass out through an amp. I'll admit, I was 50/50 on buying the bass. The neck was bowed, and it hadn't been played in a while. But that part of me couldn't let go, so I went ahead and bought it.
When I got it home it didn't work, but I was expecting that. I was sure the battery was dead. I performed the tongue test, and the 9 volt battery was completely dead. So I slapped a new battery in it, and it started to work. However, the electronics needed cleaned out. I got to that later, and the pots worked just fine.
The big problem was the neck. It was really bowed. So I did my usual luthier thing, and was not happy with myself. The neck did not want to bend. So I walked away for a bit, and checked the online videos from the Godfather of guitar repair himself, Dan Erlewine.
I realized that I was in fact, human, and had made a mistake (which I won't say what it was here.) So I went back out to the workshop, performed my super secret repair, and managed to get the neck as straight as it was going to get. It's no Tobias or Modulus, but it's much better than a Squier. Due to the truss rod not being set for years, it was going to have a little warpage. However, I still have it set up better than 90% of the basses at Guitar Center.
Next, it cleaned it up a bit. Since it hadn't been played, it was pretty dusty. I gave it a moderately good cleaning. It still has a few dings, dents, and marks, but I'm not overly worried about that.
The other good part about this deal was that I received a Roadrunner bass soft case and a Levi's guitar strap along with the bass. I think Guitar Center wants $40 for a bass case, and $20 for the strap, so I really can't complain about the deal. Well, I can't complain now that I have the neck straightened out.
So now, onto the pictures!!!!!
Here's the story. I was checking late at night on Craigslist, and saw a listing that simply said, "Bass Guitar - $120." So I clicked on it. After checking reading the ad, I had to do some research. He didn't actually list what kind of bass it was. I could see the Schecter logo on the headstock, but I had to blow up the image to see the model it was. It was a Damien 4.
I saw that they weren't made anymore, but when they were new they cost $550 new. On the used market they were going for $250 to $350. So this was a good deal.... maybe.
I still had to check it out. I admit, I broke a couple of my own rules in buying this bass. The guy had been given the bass to him for his son to try out. His son didn't like it, and it sat unplayed for a quite a while. So when I checked it out I noticed the neck was pretty bowed. But I ended up getting "Luthier muscles" and thought, "I can fix anything!!!!!"
So I met the guy in a Walgreens parking lot. This also broke another rule in that, I didn't test the bass out through an amp. I'll admit, I was 50/50 on buying the bass. The neck was bowed, and it hadn't been played in a while. But that part of me couldn't let go, so I went ahead and bought it.
When I got it home it didn't work, but I was expecting that. I was sure the battery was dead. I performed the tongue test, and the 9 volt battery was completely dead. So I slapped a new battery in it, and it started to work. However, the electronics needed cleaned out. I got to that later, and the pots worked just fine.
The big problem was the neck. It was really bowed. So I did my usual luthier thing, and was not happy with myself. The neck did not want to bend. So I walked away for a bit, and checked the online videos from the Godfather of guitar repair himself, Dan Erlewine.
I realized that I was in fact, human, and had made a mistake (which I won't say what it was here.) So I went back out to the workshop, performed my super secret repair, and managed to get the neck as straight as it was going to get. It's no Tobias or Modulus, but it's much better than a Squier. Due to the truss rod not being set for years, it was going to have a little warpage. However, I still have it set up better than 90% of the basses at Guitar Center.
Next, it cleaned it up a bit. Since it hadn't been played, it was pretty dusty. I gave it a moderately good cleaning. It still has a few dings, dents, and marks, but I'm not overly worried about that.
The other good part about this deal was that I received a Roadrunner bass soft case and a Levi's guitar strap along with the bass. I think Guitar Center wants $40 for a bass case, and $20 for the strap, so I really can't complain about the deal. Well, I can't complain now that I have the neck straightened out.
So now, onto the pictures!!!!!
Labels:
Bass,
bass guitar,
craigslist,
Damien 4,
Guitar,
guitar repair,
luthier,
Shecter,
trade
Location:
Lutz, FL, USA
Wednesday, March 9, 2016
Full Service Luthier
When I was apprenticing under my Master Luthier, Dave Pennington, it amazed me just how many services he could perform as a luthier. There were so many little things that could go wrong with a guitar, and it was important to know how to fix all those odd problems.
When I was working at Guitar Center I had many of the employees tell me how I was able to do things that they had never seen, and that most of the luthiers there before me did two things. Change strings and pickups. Outside of those jobs, they didn't do anything else. So when I pulled up with a tool case almost as tall as myself it really surprised them.
Which brings us to today. I don't perform public work on guitars anymore, but I do work for friends, family, and friends of friends. I was brought a guitar from John C. (we'll call him John C. since I don't want to use his full name on a public blog.) He had a few problems with his guitar, so I went to work correcting them. I took pictures so I could show the importance of the work I do.
First off, the three way switch was acting up. Instead of an expensive replacement, experience has told me it may just need a simple electronics cleaning.
In the second picture, I am using true electronics cleaner to clean the switch. Never! Use WD-40 on electronics.
John's guitar is an Epiphone ES-339. So I will call him Epiphone. In this next picture I am running Epiphone through my amp to make sure the three way switch was working.
The good news was that it worked just fine. All's the three way switch needed was a little cleaning and not a replacement.
Next, Epiphone was missing a screw on the pickguard. So I made a quick trip to Ace Hardware to find the correct parts.
They fit just fine. So now it's time to adjust the bracket.
Next is a little trick I learned from working on archtops. Use masking tape to tape off the F hole so you don't lose a screw in the guitar.
Next I made sure the pickguard was fit tight, and in the end everything fit just right.
Next I felt that Epiphone hadn't been socialized properly. This can happen if an owner doesn't have a ridiculous amount of guitars. So I let Epiphone socialize with other guitars named Epiphone.
This was greatly therapeutic for Epiphone. All the Epiphones were able to talk about the usual guitar stuff. You know, pickups, woods, electronics, and the power of the Alnico 8 magnet.
Next, I felt that Epiphone had a lot to talk about, but no way to loudly express himself. So I hooked him up to my amp named Epiphone. They really hit it off. I had put Epiphone Amp together a few months ago from an Epiphone Valve Jr. Head, a Bitmo mod kit, a WGS C/S speaker, and some mahogany. Epiphone the Amp really let Epiphone the Guitar find his inner voice.
Epiphone then decided to watch some TV, but I caught him napping.
I then thought Epiphone was a little tense so I decided to give him some spa therapy.
Next, I thought Epiphone could use a little massage.
I then really had to work the kinks out of his neck.
After the massage I offered Epiphone a nice cup of tea.
Which Epiphone gladly accepted.
When I was working at Guitar Center I had many of the employees tell me how I was able to do things that they had never seen, and that most of the luthiers there before me did two things. Change strings and pickups. Outside of those jobs, they didn't do anything else. So when I pulled up with a tool case almost as tall as myself it really surprised them.
Which brings us to today. I don't perform public work on guitars anymore, but I do work for friends, family, and friends of friends. I was brought a guitar from John C. (we'll call him John C. since I don't want to use his full name on a public blog.) He had a few problems with his guitar, so I went to work correcting them. I took pictures so I could show the importance of the work I do.
First off, the three way switch was acting up. Instead of an expensive replacement, experience has told me it may just need a simple electronics cleaning.
In the second picture, I am using true electronics cleaner to clean the switch. Never! Use WD-40 on electronics.
John's guitar is an Epiphone ES-339. So I will call him Epiphone. In this next picture I am running Epiphone through my amp to make sure the three way switch was working.
The good news was that it worked just fine. All's the three way switch needed was a little cleaning and not a replacement.
Next, Epiphone was missing a screw on the pickguard. So I made a quick trip to Ace Hardware to find the correct parts.
They fit just fine. So now it's time to adjust the bracket.
Next is a little trick I learned from working on archtops. Use masking tape to tape off the F hole so you don't lose a screw in the guitar.
Next I made sure the pickguard was fit tight, and in the end everything fit just right.
Next I felt that Epiphone hadn't been socialized properly. This can happen if an owner doesn't have a ridiculous amount of guitars. So I let Epiphone socialize with other guitars named Epiphone.
This was greatly therapeutic for Epiphone. All the Epiphones were able to talk about the usual guitar stuff. You know, pickups, woods, electronics, and the power of the Alnico 8 magnet.
Next, I felt that Epiphone had a lot to talk about, but no way to loudly express himself. So I hooked him up to my amp named Epiphone. They really hit it off. I had put Epiphone Amp together a few months ago from an Epiphone Valve Jr. Head, a Bitmo mod kit, a WGS C/S speaker, and some mahogany. Epiphone the Amp really let Epiphone the Guitar find his inner voice.
Epiphone then decided to watch some TV, but I caught him napping.
I then thought Epiphone was a little tense so I decided to give him some spa therapy.
Next, I thought Epiphone could use a little massage.
I then really had to work the kinks out of his neck.
After the massage I offered Epiphone a nice cup of tea.
Which Epiphone gladly accepted.
Since it was such a nice day Epiphone decided to lay out in the sun, and work on his tan/sunburst.
Well, the fun went on the rest of the day and night. But when the day ends it's time to hit the hay. So I made sure Epiphone was comfy at the Adrian Bn'B.
So that concludes my luthier duties. As you can see, I really strive to be a full service luthier. So here's the total:
Spray of electronics cleaner: $0.24
Screw for plate: $0.14
Nut for screw: $0.15
Adrian Bn'B for two nights: $378. 63
Total: $379.16.
I don't think that's too much to ask for such illustrious service.
Labels:
Alnico,
Bitmo,
Epiphone,
Epiphone Valve Junior,
Guitar Center,
guitar repair,
guitars,
luthier,
luthiery,
pickup,
WGS Warehouse Guitar Speakers
Location:
Lutz, FL, USA
Friday, October 24, 2014
The Bass! Part 4,
Part 1: http://angjellockheart.blogspot.com/2014/10/the-bass-there-are-no-such-things-as.html
Part 2: http://angjellockheart.blogspot.com/2014/10/the-bass-part-2.html
Part 3: http://angjellockheart.blogspot.com/2014/10/the-bass-part-3-punk-rock-bass.html
So I had been waiting on the bridge to arrive, and it finally did.
While it was not an exact replacement of the old one, the saddles lined up just fine. And in the end, that's what's important.
I then had to deal with the pickguard not lining up exactly. However, the use of a long screw took care of a, now, tiny problem.
As you can see, it worked out pretty good. It holds rather nicely.
However then came a problem I did not forsee. This happens with older guitar or bass necks. With no tension on it, the neck is straight. But with the strings at full tension the heal kicks up. So I am torn between having insanely high action, or the frets not being playable from the 12th fret up.
Now, the normal way to correct this is to yank out the frets below the 12th fret, shave the fingerboard, and replace the frets. However, the fingerboard is maple, and if I shave it I will have to re-finish it. Right now, I don't have time for that. I have to make the bass somewhat playable for the next gig.
Once we cross that bridge, I will go back and start work on it. I might be able to shave the frets down, and make it playable. But I'll deal with that when I get there.
I knew I would be a pain to put this thing together, but I didn't think it would be "THIS" much of a pain. I did a lot more work on this thing than I had planned to.
But here's the result. Not too bad.
Part 2: http://angjellockheart.blogspot.com/2014/10/the-bass-part-2.html
Part 3: http://angjellockheart.blogspot.com/2014/10/the-bass-part-3-punk-rock-bass.html
So I had been waiting on the bridge to arrive, and it finally did.
While it was not an exact replacement of the old one, the saddles lined up just fine. And in the end, that's what's important.
I then had to deal with the pickguard not lining up exactly. However, the use of a long screw took care of a, now, tiny problem.
As you can see, it worked out pretty good. It holds rather nicely.
However then came a problem I did not forsee. This happens with older guitar or bass necks. With no tension on it, the neck is straight. But with the strings at full tension the heal kicks up. So I am torn between having insanely high action, or the frets not being playable from the 12th fret up.
Now, the normal way to correct this is to yank out the frets below the 12th fret, shave the fingerboard, and replace the frets. However, the fingerboard is maple, and if I shave it I will have to re-finish it. Right now, I don't have time for that. I have to make the bass somewhat playable for the next gig.
Once we cross that bridge, I will go back and start work on it. I might be able to shave the frets down, and make it playable. But I'll deal with that when I get there.
I knew I would be a pain to put this thing together, but I didn't think it would be "THIS" much of a pain. I did a lot more work on this thing than I had planned to.
But here's the result. Not too bad.
Labels:
80's,
Bass,
bass guitar,
Cort,
Dragonfire,
EMG,
Guitar,
guitar repair,
luthier,
luthiery,
Music,
music woodworking,
musicians,
parts,
pickups,
punk rock,
repair
Location:
Lutz, FL, USA
Thursday, May 8, 2014
Late Night Luthiery: Dean ML Bubinga Edition
If you read a few posts back in my blog, you will see the hilarious amount of guitar trades I made. I was trying to sell a number of guitars, but ended up trading most of them since everyone is heavy in guitars, but poor in cash. One of the trades I made was for a Dean ML Bubinga.
I loved the guitar from the moment I saw it. It was in perfect condition, with no dings or anything. The only problem was the pickups sucked. I mean, they were bad. So I have made a few changes on the guitar.
The first was to fret dress it. The frets were awful. I admittedly tried to get a little ambitious with the action, but it needed fret dressed in the worst way.
Next, I changed the pickups out. I had quite a time with that. Here's the short version.
1. I bought a Gibson 496R/500T set, but the 496R was broken. That left me with a bridge pickup, but no neck pickup.
2. I bought a GFS Crunchy Pat, and was happy with it. However....
3. I traded a guitar for a number of things, including a Dimarzio Super Distortion.
So I decided to put the Super D in the neck, and the 500T in the bridge. Simply put, it is awesome.
But that's not everything. The one thing that I thought was strange was that the pickup rings were black. I don't know if I have ever seen a Dean ML with black rings. They have always been cream. So I changed them out for cream rings. This is the final product:
I loved the guitar from the moment I saw it. It was in perfect condition, with no dings or anything. The only problem was the pickups sucked. I mean, they were bad. So I have made a few changes on the guitar.
The first was to fret dress it. The frets were awful. I admittedly tried to get a little ambitious with the action, but it needed fret dressed in the worst way.
Next, I changed the pickups out. I had quite a time with that. Here's the short version.
1. I bought a Gibson 496R/500T set, but the 496R was broken. That left me with a bridge pickup, but no neck pickup.
2. I bought a GFS Crunchy Pat, and was happy with it. However....
3. I traded a guitar for a number of things, including a Dimarzio Super Distortion.
So I decided to put the Super D in the neck, and the 500T in the bridge. Simply put, it is awesome.
But that's not everything. The one thing that I thought was strange was that the pickup rings were black. I don't know if I have ever seen a Dean ML with black rings. They have always been cream. So I changed them out for cream rings. This is the final product:
I tend to play more vintage style humbuckers, so this was a nice change. I wanted something that Dimebag Darrell would say, "Hell yeah!!!" This guitar is made to be played loud. And I will do that.... in the afternoon. Really I wasn't kidding about the "Late Night Luthiery title." I'm writing this pretty late at night. But in the afternoon, I will rock it out.
Labels:
Dean Guitars,
Guitar,
guitar repair,
ML
Location:
Lutz, FL, USA
Wednesday, May 29, 2013
Repairing Josh's Guitar, Part 2
For Part 1, read this:
http://angjellockheart.blogspot.com/2013/05/repairing-joshs-guitar-part-1.html
I'll start from where I left off last time. Basically I had glued the guitar's neck back together, and had sanded the rough cracks even. I had added stain and the first coat of wipe on polyurethane.
My next steps where just adding wipe on poly once a day for a number of days. Once I had done that I decided to buff out the neck on my buffing machine. Here's the pictures from that.
I have to say that I am pretty happy with that. I wasn't sure how it was going to come out. Honestly, I have to say this was my best work on a cracked neck. But truthfully, no two cracked guitar necks are the same. But I was able to get this repaired, and the truss rod still works fine. That's a giant relief.
So next was making the bone nut. Since Josh had lost the original plastic nut, I had to build him a new one. I won't go over step by step on how I made it. Only know that I put a good amount of time into it. I hadn't made a bone nut in years, and there is a real art to it. You can put a lot of time and effort into making one, and despite your best efforts it can come out like crap. Like I said, there is a real art to it.
But I'm glad to say it came out great. Here are the pictures of me making it.
If you wonder what the black marks are, those are graphite from a pencil. It helps slicken the grooves so the strings slide easier.
Next up was double checking how the poly on the back of the neck had dried.
I gotta say, I am really pleased with how the guitar came out. I set it up, and it plays really nice. Now let's hope that Josh won't do something else dangerous to this guitar.
http://angjellockheart.blogspot.com/2013/05/repairing-joshs-guitar-part-1.html
I'll start from where I left off last time. Basically I had glued the guitar's neck back together, and had sanded the rough cracks even. I had added stain and the first coat of wipe on polyurethane.
My next steps where just adding wipe on poly once a day for a number of days. Once I had done that I decided to buff out the neck on my buffing machine. Here's the pictures from that.
I have to say that I am pretty happy with that. I wasn't sure how it was going to come out. Honestly, I have to say this was my best work on a cracked neck. But truthfully, no two cracked guitar necks are the same. But I was able to get this repaired, and the truss rod still works fine. That's a giant relief.
So next was making the bone nut. Since Josh had lost the original plastic nut, I had to build him a new one. I won't go over step by step on how I made it. Only know that I put a good amount of time into it. I hadn't made a bone nut in years, and there is a real art to it. You can put a lot of time and effort into making one, and despite your best efforts it can come out like crap. Like I said, there is a real art to it.
But I'm glad to say it came out great. Here are the pictures of me making it.
If you wonder what the black marks are, those are graphite from a pencil. It helps slicken the grooves so the strings slide easier.
Next up was double checking how the poly on the back of the neck had dried.
I gotta say, I am really pleased with how the guitar came out. I set it up, and it plays really nice. Now let's hope that Josh won't do something else dangerous to this guitar.
Labels:
art,
artist,
Dean Guitars,
Guitar,
guitar repair,
guitars,
luthier,
luthiery,
Music,
music woodworking,
musicians,
wood,
woodwork,
woodworking
Location:
Lutz, FL, USA
Subscribe to:
Posts (Atom)