Thursday, January 31, 2019

The Tenor Guitar Project: Part 3

For Part 1:

https://angjellockheart.blogspot.com/2019/01/new-yearnew-project-tenor-guitar-project.html

For Part 2:

https://angjellockheart.blogspot.com/2019/01/the-tenor-guitar-project-part-2.html


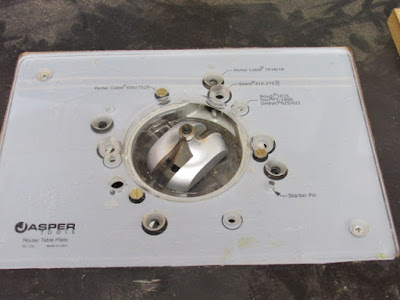
In my last post I had just finished working on the body of the guitar.  I still needed to round over the back of the body.  This lead to an awkward problem.  I don't use my table router that much, so I was trying to get to set up correctly.  Here's my table router with special routing bit.


I would have one problem which would then lead to another problem.  My routing machine was acting up.  I won't go into the long version, but I actually had to break out the instruction manual to find the problem.

Do you see the little spring?


That spring moved from where it was supposed to be.  This lead to the router not doing what it was supposed to.  I had looked all over the router, and it was only when I read the manual I found what was wrong.  All I had to do was move the spring back into place, and it worked just fine.

Once I had the router set up correctly it only took me ten minutes to cut the body correctly.


I made about four or five passes on the router, slowly adjusting the bit little by little.  Now that I had cut the edge how I liked, I broke out the hand rotating palm sander.  I used heavy 60 grit sandpaper to smooth out the sides.


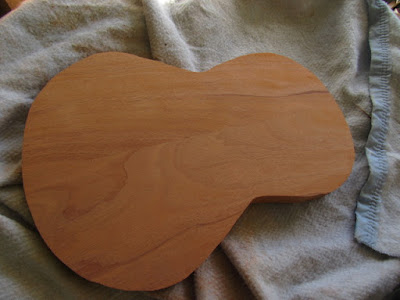
Now onto the top plate.  I had carved the arch on the top of the top plate, but now I had to carve away its inside.  Since I'm a modern guy, I decided to use some modern tools.  I use a mini-routing bit on a Dremel tool.  I have a mini-router base that the Dremel then sits in.

After marking how far I want to cut the inside of the top plate I used my mini-router to cut away the inside.


Next up I used my hand planers to even out inside.


Next up I used what is now becoming my favorite sander, my rotating hand palm sander.  Notice how well it smoothed the inside?


I laid out my parts for this build.  Notice the four string humbucker from C.B. Gitty?  Cool, huh?


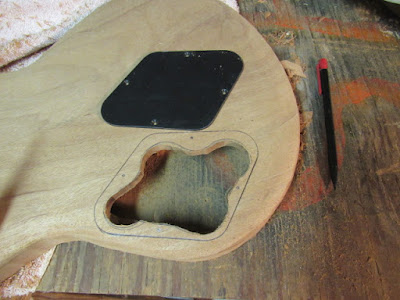
Now, it was literally back to the drawing board.  I put my templates on the table so I could cut out the control cavity and F-Holes on them.


On a funny note, I've had a surgical scalpel kit for almost two decades.  This is the first time I've ever got to use it.  I found out that the scalpel is much better than scissors for myself.  At least, I am more accurate with the scalpel.

Now I finally got to break out my new router (not to be confused with the table router.)  I had to buy a new one because the old one broke.  In all fairness it was older than me.  They didn't even make replacement parts for it anymore.

So it was  now time to do some routing.  First I used a forester bit to cut away wood I didn't need.  Then I routed the rest out.


Now it was time to go back to the mini-router.  I had to recess the control cavity cover.  First up, I made sure to measure where I was cutting very carefully.


This is after I used the mini-routing bit.


Then it was time to check the fit of the control plate.


It turned out pretty good.  

So we'll stop right here.  There's lots more luthiery to come.  Stay tuned for part 4.  

Monday, January 28, 2019

Idiot Scoutmasters: Once Bitten, Forever Stupid

Last year I decided I would write blog posts about stupid things my Scoutmasters had done while I was in the Boy Scouts of America.  This is my second article.

Here is the first:

Idiot Scoutmasters: A True Story of a Scout's Canteen


My story again revolves around my Scoutmaster, Mr. Brasher.  Needless to say, he had a alternative way of teaching us boys.  When it came to First Aid, he had a belief that immersion was a better teacher than learning by the book or from a teacher.

We were at some sort of camping event with other troops.  We would go to one station, and learn First Aid.  We would then go to another station, and study something else.  Well, it was a few hours after we had learned First Aid, and we were being instructed about another subject.

Out of nowhere I saw Mr. Brasher screaming like he was in pain, as he started running around like a chicken with its head cut off.  It was then I heard him scream, "It bit me!  It bit me!"

I thought, "He's just been bit by a snake!!!"  It only took 0.02 seconds later for me to realize that he was acting like he had just been bitten by a snake to see what we would do.  Still, this kind of behavior had become normalized to me.  I was the first one to run up, and yell at him to, "stay calm!"
A few hours earlier at our First Aid class we had learned the importance of keeping a snake bit victim calm.  We were told to tackle the person if needed.  Anything to keep them from running around, and increasing their heartrate.

As a twelve year old I was proud that I was the first one to grab him, and yell at him to keep calm.  You know, he actually kept up the act yelling back at me that, "He was bit by a snake!  It bit me!  It bit me here!"  But now that I think back on the incident, it's weird how normalized that sort of behavior became to me.  But then again, I was only twelve.

The real kicker was that Mr. Brasher actually had a snake.  A rubber snake.  He had brought a rubber snake along on the camping trip just to pull off that stunt.  That's the kind of mindset I had to deal with.


Strange Tradings: New Guitar Day: Gretsch Edition

It all began with a Craigslist ad.  No!  Not that kind of ad you pervert!  I was browsing the musical instruments on Craigslist when I saw an add that interested me.

It said, "Gretsch 135th Anniversary Edition G5420TG FS/FT."  I had to click on it.  I knew I couldn't buy it, but something told me I had to take a peek.  The photos were great.


A two-tone Gretsch in Ruby Red and Gold Sparkle?  That's a pretty kick ass guitar!  I was reading the description when something caught my attention.  It said, "Will consider trades of multiple guitars for this guitar."

So I made a few offers to the seller.  He was receiving multiple offers so he wasn't sure which one to go with.  I made a second offer for three guitars and two cases for his Gretsch and case.  I also agreed to meet him at Guitar Center which was halfway for both of us.  It was also the closest meeting place that someone (me) had offered to me him at.  Everyone else seemed to be fifty miles away from him.

So here's what I offered.

I had just traded a Tele for this 2004 MIM Stratocaster.  I looked the Strat up on the Fender Serial Number Lookup.  It showed it exactly as pictured.  The only difference was someone had added Fender Locking Tuners.  I also traded a generic hardshell case with it.


An Agile 2500 Les Paul style guitar.


And an Epiphone ES-335 Pro with GFS hardshell case.


I realize that some might say that I overpaid/over-traded for the Gretsch, but there is a method to my madness.  90's to 2000's Fender MIM Strats are great guitars.  I've had a few, and I really dig them.  Unfortunately, there are a lot of them on the market, so they don't command high prices.  Well, let me say, sellers ask a good amount for them, but I never see them selling for what they are asking. 

The Agile I managed to snag for a good deal.  It needed one of my fabulous fret-dressings and set-ups, but after that it played well.  I just couldn't bond with it. 

The Epiphone I also received a good deal on.  I did add a lot of things such as new pickups, a bone nut, strap-locks, fancy knobs, and of course the GFS paisley hardshell case.  

The trader brought a family member to check out the guitars.  He was really impressed with how I had them set up.  He gave the gentleman the okay to make the trade.  I glanced over the Gretsch.  It didn't have a mark on it.  The neck wasn't perfectly straight like a Japanese made one would be, but the frets were all even, and all notes were playable.  

So I think it worked out for everyone.  The Orlando Guitar Show is coming up, and everyone is trying to sell gear before the show comes.  So the buying market is terrible right now.  That's one reason I was glad to trade off three guitars.  I didn't have to worry about trying to sell them individually.  

It worked out well for both of us, and in the end, that's what's important.  I hope he had fun with them.  I know I will.  Let's all just keep on rock'in.  

Sunday, January 27, 2019

The Tenor Guitar Project: Part 2

For Part 1:

https://angjellockheart.blogspot.com/2019/01/new-yearnew-project-tenor-guitar-project.html


My work on the tenor guitar project has been progressing quickly.  Luckily I have been taking lots of photos to show my work on here.

In my previous post I had just glued up pieces of mahogany for the guitar body.  My next objective was gluing the pieces of mahogany together.  I used my planer/edger to put a nice clean and even edge on the pieces of wood.  I also ran the pieces of mahogany through a thickness planer so they would be the perfect thickness.


Next up I got serious.  I broke out the pipe clamps.  For those who don't know pipe clamps will squeeze anything together.  Anything.


I ended up leaving this clamped for five days.  Mainly due to bad/cold weather, and the fact that I was working on other things during this time.  So while the glue dried it was time to work on the top plate.

I glued the pieces of spruce together, and gave it two days to dry.  Now came to the fun part.  I was finally able to put a template down on the spruce, and draw the outline.


I cut the top plate out with a bandsaw, and smoothed the edges with a spindle sander.  

Next it was time to start cutting the arch top.  If you read or saw Robert Bennedetto's book and/or DVD, "How to build an archtop guitar," he uses this method to help guide a luthier on how to cut an archtop correctly.

I measured the edges at 1, 2, and 3 inches.  I marked it with a pencil.  


Next, I took the smallest drill bit I had and marked the depth using a drill press.


Next it was time to break out the hand planers.  


It looks rough, but I kept at it.


Can you believe it looks like this now?  Well, it took a lot of sanding to achieve this look.  The good news is I managed to cut the top very proportionally.  In other words, one side matches up perfectly with the other.


Admittedly, cutting all that wood made a heck of a mess.


Now it was time to cut out the body.  First, I sanded it down smooth.  Next it was time to draw out the template on the body.  


The next step was to cut out the body on the bandsaw.  After that I used the spindle sander to even out the edges.


It was now time to sand the body down a little more.


The woods' grain is really starting to pop now.  

Next I flipped the body over so the inside was face up.  I marked the body one inch from the edge.  


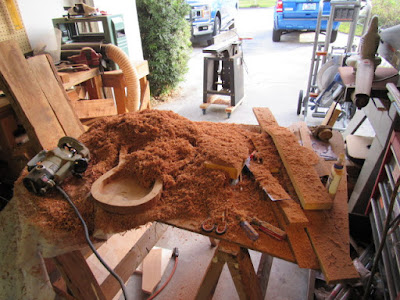
Now it was time to do some serious routing.  Let's just fast forward to where I am knee deep in wood shavings.  Just know this step took a while.


Yeah, I was able to toss some of the shavings around the yard.  This is what I am was working with after using the router.


It was now time to use a hand/palm sander on the inside of the body.  That cleaned it up a bit. 


And here's a shot of the top and sides.  I had just sanded the sides with the spindle sander.  I also used a hand sander and a hand/palm rotary sander to sand the entire body.  


Please realize that for it to look the way it does a lot of sanding occurred.  I know these photos may make it seem like it magically came out the way it did, but that's pretty far from the truth.  A lot of time and effort were put in.  And a good amount of that time I spent sanding.  Thank goodness for all my mechanical sanding tools.  

I managed a lot of work in a short period of time.  But the work is still ongoing.  Stay tuned for part three.