I decided to paint a "Fall' painting. I also decided to paint it Bob Ross style. Really fast, and lots of paint. I'm still undecided on it.
The first picture is with a flash. The second one is without one.
There are things I like about it, but I think by getting in a hurry I put paint where paint didn't need to be. I know you are supposed to look at paintings at least 10 feet away, so looking at them on the computer kind of defeats that point.
I don't know. I was happy with it, but the more I look at it, the more I am unhappy with it. Maybe I should add some more paint overtop of other paint?
This reminds me of a previous blog I wrote called, "I am a terrible painter."
http://angjellockheart.blogspot.com/2012/03/i-am-terrible-painter.html
That was followed by, "I am a terrible painter, part 2."
http://angjellockheart.blogspot.com/2012/04/i-am-terrible-painter-part-2.html
Of all the funny things that was followed by, "I am a sloppy painter?"
http://angjellockheart.blogspot.com/2013/03/i-am-sloppy-painter.html
I guess the main point I was making is that, I am really bad at painting. I'll have to think on which direction to go with this painting, even thought it is technically "finished."
I look at life a bit differently, and like to post my weird thoughts. I like musicial instrument repair and woodworking. For trying to live a somewhat normal life, a lot of weird things happen to me. Instead of putting up with it, I post about it in this blog.
Showing posts with label Arts and Crafts. Show all posts
Wednesday, September 17, 2014
Falling in Autumn
Labels:
art,
artist,
Arts and Crafts,
Autumn,
Awful,
bad art,
Fall,
painting,
terrible art
Location:
Lutz, FL, USA
Thursday, August 21, 2014
Project 7, The Project To End All Projects
No, not really. I hope this won't be the last of my projects. But enough of my shtick. I am starting a new project. It is going to be a copy of a 1954 Les Paul Custom. Here's what one looks like.
I would be making a few changes to it. I will be making it mostly out of black walnut. I will also be adding an archtop tailpiece out of it. The neck will be a three piece walnut neck.
Let me start at the beginning. First, I acquired some black walnut in West Virginia. Here it is in it's rough sawn form.
I would be making a few changes to it. I will be making it mostly out of black walnut. I will also be adding an archtop tailpiece out of it. The neck will be a three piece walnut neck.
Let me start at the beginning. First, I acquired some black walnut in West Virginia. Here it is in it's rough sawn form.
So I cleaned it up by running it though the planner/joiner.
It really cleans up nicely. Once it gets some finish on it, it looks even better.
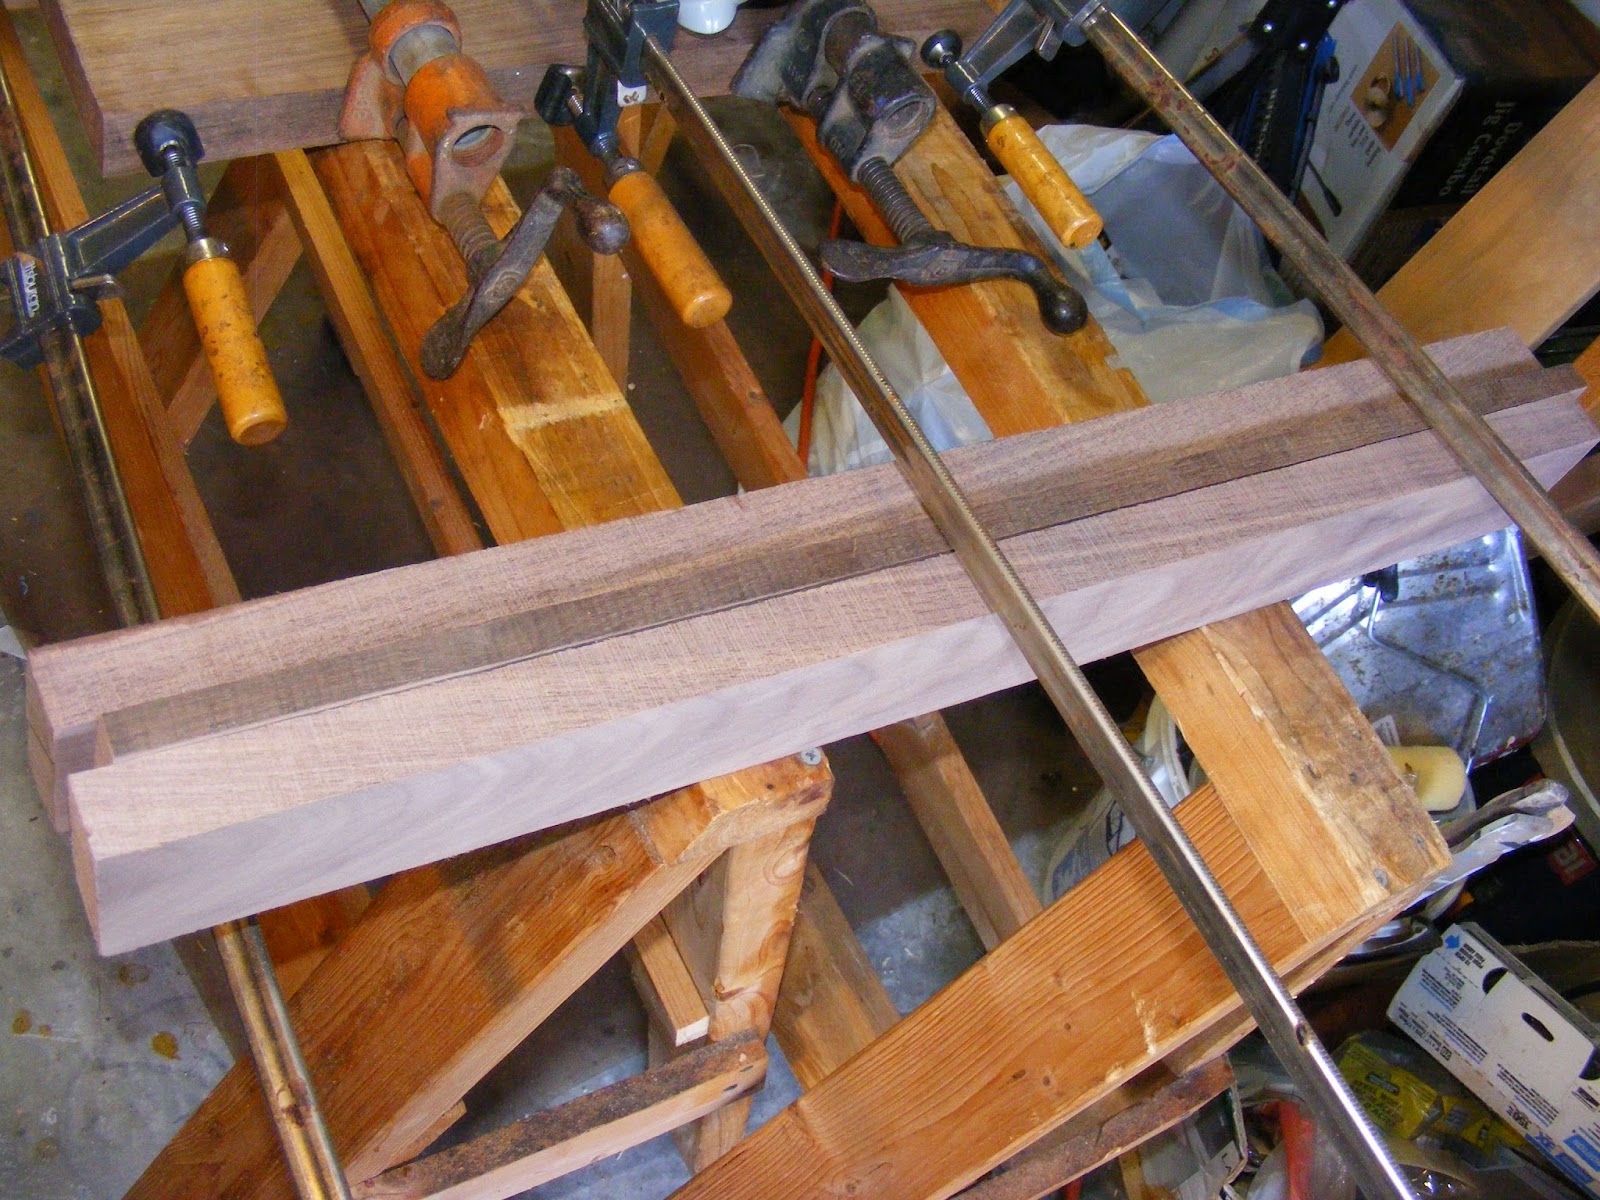
So the next thing I did was join up the body pieces.
I then cleaned up the three pieces of walnut for the neck. I then glued them together.
So I do have a few goals for this guitar. Instead of painting it black like the Gibson version, I am going to dye it black. That way it's still dark, but you can see the grain pop through. I am also going to use gold hardware like the original. I am still up in the air about what type of wood I will be using for the top. However, I am trying to track down a certain piece of wood for it.
The good news is that I will always add lots of pictures, and continue to update my blog. I am really digging this project, so hopefully it will turn out pretty good. Stay tuned!
Saturday, May 24, 2014
Even In His Youth.... He Wanted To Plug In, Part 2
Here is part 1 for those who missed it:
http://angjellockheart.blogspot.com/2014/05/even-in-his-youth-he-wanted-to-plug-in.html
So here's what I have done to this cello/bass now that I have had a chance to work on it.
1. Fret dress. It's a Squier, so duh.
2. I installed the Seymour Duncan Basslines pickups. I used the Quarter Pounder set. It sounds awesome.
3. When I set up the bass I had to really turn the truss rod a few times. It has never been turned, so I had to really turn it a few times until it started to put pressure on the neck.
4. I was able to get the individual strings at Guitar Center. They tuned up just fine with a low amount of string pull.
5. I decided to make a major change on it. I decided to move the output jack. I didn't like that it was on the front of the body next to the controls. I put it in the usual place for a guitar or bass, on the edge.
Here's the after pictures.
I have the strap and strap locks on order, so that will be fun when they arrive. So far it's been fun to play. I am going to have to break out the old orchestra music, and play it on my new cello/bass. Of course, this means I am going to have to get a bass amp. That'll be a good post in the future.
http://angjellockheart.blogspot.com/2014/05/even-in-his-youth-he-wanted-to-plug-in.html
So here's what I have done to this cello/bass now that I have had a chance to work on it.
1. Fret dress. It's a Squier, so duh.
2. I installed the Seymour Duncan Basslines pickups. I used the Quarter Pounder set. It sounds awesome.
3. When I set up the bass I had to really turn the truss rod a few times. It has never been turned, so I had to really turn it a few times until it started to put pressure on the neck.
4. I was able to get the individual strings at Guitar Center. They tuned up just fine with a low amount of string pull.
5. I decided to make a major change on it. I decided to move the output jack. I didn't like that it was on the front of the body next to the controls. I put it in the usual place for a guitar or bass, on the edge.
Here's the after pictures.
I have the strap and strap locks on order, so that will be fun when they arrive. So far it's been fun to play. I am going to have to break out the old orchestra music, and play it on my new cello/bass. Of course, this means I am going to have to get a bass amp. That'll be a good post in the future.
Labels:
amp,
amplifier,
Arts and Crafts,
Bass,
cello,
Fender,
Guitar,
Jaguar,
Seymour Duncan,
Squier
Location:
Lutz, FL, USA
Thursday, September 5, 2013
Adrian: Amatuer Craftsman, The Bathroom Cabinet, Part 4
So here's the great news. The cabinet is finished. Lili (not her real name) finished up the details on the vines and flowers that adorn the cabinet. We then applied a layer of wipe on poly to seal the paint.
Here's the photos:
So now that the cabinet is ready it's time to hang it up right? Well, not exactly. You see, it has been decided that the bathroom needs to be painted, and it wouldn't make any sense to hang this up, and then paint. So, we will wait until the bathroom is painted, and then we will hang the cabinet up.
Well, that also means good news in that, I get another blog or two out of this project. Stay tuned. More will be coming.
Here's the photos:
So now that the cabinet is ready it's time to hang it up right? Well, not exactly. You see, it has been decided that the bathroom needs to be painted, and it wouldn't make any sense to hang this up, and then paint. So, we will wait until the bathroom is painted, and then we will hang the cabinet up.
Well, that also means good news in that, I get another blog or two out of this project. Stay tuned. More will be coming.
Location:
Lutz, FL, USA
Sunday, August 25, 2013
New Sloppy Art Day
I've done a few bad art/ sloppy art posts before, so here's another one. Every now and then I get some time and decide to paint a few paintings. But before I get into that let me explain my painting style. Honestly, I can't paint life-like/realistically to save my life. I learned that I am too impatient, and way too sloppy. But then, I was introduced to impressionist art. And it was perfect for me. I found that the sloppier I was, the better I was.
So here's what I have been up to lately.
This one is called "Picasso's Blue Reef." Of all the paintings I have painted, I think I like this one the best. I wanted to do something like Picasso, where he had a "blue" period. I thought, what if I took Picasso's blue thoughts, and used them to paint a coral reef. So I used all sorts of blues on this painting. It came out great. Again, I am really happy with it.
This one is called "Around the Old Oak Tree." I wanted to so something a bit different. This was supposed to be part of a five part series. I'm still working on the series, but this one was supposed to be "Earth." The picture itself is a little brighter than it is in real life due to the flash. I think it's a nice, happy painting that doesn't try to over think anything. It's just nice.
This one is called, "The Little Red Admiral From Argentina." The butterfly itself is called a Red Admiral, and the species that I painted makes its home in Argentina. Again, this was something outside my comfort zone. I actually started painting a butterfly, but it didn't turn out right. So I painted over that painting, and came up with this. I'm pretty happy with it. It has a lot more detail than you can see in the photo.
This is part one of a two part series. I made this painting and the following one as a "fire and ice" theme. This of course, would be the ice. I call it, "Busy Day on the Blue Reef." Here's a funny note. I had an idea for a brush I needed, but they didn't make that kind of brush. So I went to Home Depot, bought a brush, and cut it to the needed shape. If you see the "seaweed" on the bottom, that's what I used the brush to paint.
This one is called, "Maroon 5 Clownfish." Yes, I am a bit of a smart aleck. But if you look there are 5 Maroon Clownfish in the picture. I also used my special brush in the middle bottom of this painting. It's come in really handy. At first, I wasn't sure how this painting would come out. But once the finishing touches were put on it, it really started to pop out.
So that's what I have been up to lately. Stay tuned. I'm sure I will spit out a couple more works pretty soon.
So here's what I have been up to lately.
This one is called "Picasso's Blue Reef." Of all the paintings I have painted, I think I like this one the best. I wanted to do something like Picasso, where he had a "blue" period. I thought, what if I took Picasso's blue thoughts, and used them to paint a coral reef. So I used all sorts of blues on this painting. It came out great. Again, I am really happy with it.
This one is called "Around the Old Oak Tree." I wanted to so something a bit different. This was supposed to be part of a five part series. I'm still working on the series, but this one was supposed to be "Earth." The picture itself is a little brighter than it is in real life due to the flash. I think it's a nice, happy painting that doesn't try to over think anything. It's just nice.
This one is called, "The Little Red Admiral From Argentina." The butterfly itself is called a Red Admiral, and the species that I painted makes its home in Argentina. Again, this was something outside my comfort zone. I actually started painting a butterfly, but it didn't turn out right. So I painted over that painting, and came up with this. I'm pretty happy with it. It has a lot more detail than you can see in the photo.
This is part one of a two part series. I made this painting and the following one as a "fire and ice" theme. This of course, would be the ice. I call it, "Busy Day on the Blue Reef." Here's a funny note. I had an idea for a brush I needed, but they didn't make that kind of brush. So I went to Home Depot, bought a brush, and cut it to the needed shape. If you see the "seaweed" on the bottom, that's what I used the brush to paint.
This one is called, "Maroon 5 Clownfish." Yes, I am a bit of a smart aleck. But if you look there are 5 Maroon Clownfish in the picture. I also used my special brush in the middle bottom of this painting. It's come in really handy. At first, I wasn't sure how this painting would come out. But once the finishing touches were put on it, it really started to pop out.
So that's what I have been up to lately. Stay tuned. I'm sure I will spit out a couple more works pretty soon.
Labels:
amateur,
art,
artist,
Arts and Crafts,
bad art,
brush,
clownfish,
coral reef,
Fish,
folk art,
Home Depot,
paint,
painting
Location:
Lutz, FL, USA
Monday, August 19, 2013
Adrian: Amatuer Craftsman, The Bathroom Cabinet, Part 3
Since the last blog here's what's happened to the cabinet. I slapped a lot more white paint all over it. It really needed the paint to be a little thicker. I also had Lili come over, and start painting the decorative vines and flowers on it.
She is halfway through on it, and it's starting to look really good. So here's the pictures of the cabinet so far. You can see that some of the flowers are finished, and others still need some work. And of course, once it's finished I'll take some more detailed pictures.
But here's the progress so far.
She is halfway through on it, and it's starting to look really good. So here's the pictures of the cabinet so far. You can see that some of the flowers are finished, and others still need some work. And of course, once it's finished I'll take some more detailed pictures.
But here's the progress so far.
Location:
Lutz, FL, USA
Wednesday, August 14, 2013
Adrian: Amatuer Craftsman, The Bathroom Cabinet, Part 2
So, here it is another day, and another coat of paint. Or two actually. I'm not sure. This thing has needed so much paint on it. Anyway, here's the rundown.
1. More paint.
2. Turned it the correct way for the camera.
3. Took pictures.
Let's look at those pictures!
There may be a place that looks like I didn't get it with paint. That's not the case. That is where the light is hitting it funny.
So after it dries a bit I may have one place I might have to knock down with sandpaper. I will also see if the bottom needs painted again. I figure it might. But other than that it looks okay.
Hopefully the next post will be about adding all the designs on it. I couldn't stand it if it was just sanitarium white. It really does need a little color on it.
1. More paint.
2. Turned it the correct way for the camera.
3. Took pictures.
Let's look at those pictures!
There may be a place that looks like I didn't get it with paint. That's not the case. That is where the light is hitting it funny.
So after it dries a bit I may have one place I might have to knock down with sandpaper. I will also see if the bottom needs painted again. I figure it might. But other than that it looks okay.
Hopefully the next post will be about adding all the designs on it. I couldn't stand it if it was just sanitarium white. It really does need a little color on it.
Location:
Lutz, FL, USA
Tuesday, August 13, 2013
Adrian: Amatuer Craftsman, The Bathroom Cabinet, Part 1
I have a big empty space in my bathroom. It's true. Here's a picture.
Really big and empty huh? For years I have thought of putting a cabinet there, but have never gotten around to it. So I checked out Home Depot's cabinets and saw exactly what I wanted. But then I read the reviews. It seems the cabinet I wanted was made out of particle board with a lot of paint over it. And they wanted $80 for it to boot. The reviews were completely scathing, saying they should be ashamed to charge that much for such a piece of crap, and you still had to assemble it!
So I decided, "Hey, I'm a woodworker. I can build my own cabinet." And why not? I have all this hardwood lying around, I might as make it for free! I decided to make it in a folk art style. Kind of an open cabinet meets folk art style.
I won't bore you with all the details, and how I completely overheated myself for the first time in 17 years. No, it's picture time. I didn't get a shot of it with naked wood. So here it is after the primer coat, and one coat of paint.
You know what I just realized? That is the back of the cabinet. It sure is. But that's okay. Because I will most likely have two more blogs about this cabinet. The second one will show the cabinet once it is painted white for the final time. The third blog will show it on the wall, and with all the folk art designs on it.
Oh, did I not mention that? Yes, my girlfriend Lili (not her real name) and myself will paint some designs on it to match my bathroom. I'm sure this will look great once it's all complete.
Stay tuned for more.
Really big and empty huh? For years I have thought of putting a cabinet there, but have never gotten around to it. So I checked out Home Depot's cabinets and saw exactly what I wanted. But then I read the reviews. It seems the cabinet I wanted was made out of particle board with a lot of paint over it. And they wanted $80 for it to boot. The reviews were completely scathing, saying they should be ashamed to charge that much for such a piece of crap, and you still had to assemble it!
So I decided, "Hey, I'm a woodworker. I can build my own cabinet." And why not? I have all this hardwood lying around, I might as make it for free! I decided to make it in a folk art style. Kind of an open cabinet meets folk art style.
I won't bore you with all the details, and how I completely overheated myself for the first time in 17 years. No, it's picture time. I didn't get a shot of it with naked wood. So here it is after the primer coat, and one coat of paint.
You know what I just realized? That is the back of the cabinet. It sure is. But that's okay. Because I will most likely have two more blogs about this cabinet. The second one will show the cabinet once it is painted white for the final time. The third blog will show it on the wall, and with all the folk art designs on it.
Oh, did I not mention that? Yes, my girlfriend Lili (not her real name) and myself will paint some designs on it to match my bathroom. I'm sure this will look great once it's all complete.
Stay tuned for more.
Labels:
art,
Arts and Crafts,
building,
cabinet,
crafts,
craftsman,
folk art,
wood,
woodwork,
woodworking
Location:
Lutz, FL, USA
Saturday, March 30, 2013
I am a ..... Sloppy Painter?
To understand this blog post better, read the following blogs first.
Part 1. I am a terrible painter
http://angjellockheart.blogspot.com/2012/03/i-am-terrible-painter.html
Part 2. I am a terrible painter, part 2
http://angjellockheart.blogspot.com/2012/04/i-am-terrible-painter-part-2.html
With the help of friends and family I have come to the understanding that I am not a terrible painter/ artist. I am just different. Art can be so subjective, and no one sees things the same way. It actually surprised me when I learned that many of the impressionist painters have very bad eyesight, and that's why they painted that way. As a person with really bad eyesight, I can sympathize. I can also take my glasses off, and see another way to view the world. And when I do that I feel like my art can be defined as something other than terrible. It actually does have a place in the art world.
I have also been told that what I lack in technique, I make up for in style. As in, my own painting style. I've known many painters that can copy other people's techniques, and can draw things very exact, but they lack their own sense of style. I am kind of the other way. I have limited techniques that I use on every painting, but they are my own. If you look at one of my paintings you will know that I painted them due to my style, and not someone else.
I admit, I do like to paint coral reefs. I think they give me a great excuse to go crazy with the paints. When people look at coral reef paintings they expect lots of color and energy, and I'm more than glad to give them that.
Here's some that I have painted recently.
"Lost Anchor"
It started out as a painting called, "Goth Night at the Coral Reef." I called it that due to the very abstract colors I choose for it. I had painted the background, and was really happy about it, and then nothing. I couldn't decide on what I wanted to do with it. I then put it away for 6 months. After a while I decided it needed a rusty anchor in it. Most paintings in the impressionist style are best seen at a distance of 10 or more feet. So posting a picture of it on the internet makes it kind of hard to view. It does look a little odd when you are 2 feet from the image on your screen, but in real life this looks pretty good.
The next painting I did was called, "My Brain Corral is Smarter Than Your Brain Coral."
This picture was taken after I added the background.
And here is the finished painting.
I do have to give credit to my Girlfriend. She painted the Angelfish. I wanted something nice and neat to contrast with the sloppy painting.
And by that, I mean I think I have found my niche. I am not a terrible artist. I am a sloppy artist. And I don't mean that in a bad way. I mean that when I paint sloppily and don't think much about what I'm doing, it turns out great. When I try to be precise, it turns out horrible. So by slinging paint and being sloppy, I am actually being a better artist. I am okay with that.
I will say this, I think my techniques are getting more refined so I can take what's in my head, and put it on the canvas a little better. I feel really excited about my next painting. I think it will turn out pretty good.
Part 1. I am a terrible painter
http://angjellockheart.blogspot.com/2012/03/i-am-terrible-painter.html
Part 2. I am a terrible painter, part 2
http://angjellockheart.blogspot.com/2012/04/i-am-terrible-painter-part-2.html
With the help of friends and family I have come to the understanding that I am not a terrible painter/ artist. I am just different. Art can be so subjective, and no one sees things the same way. It actually surprised me when I learned that many of the impressionist painters have very bad eyesight, and that's why they painted that way. As a person with really bad eyesight, I can sympathize. I can also take my glasses off, and see another way to view the world. And when I do that I feel like my art can be defined as something other than terrible. It actually does have a place in the art world.
I have also been told that what I lack in technique, I make up for in style. As in, my own painting style. I've known many painters that can copy other people's techniques, and can draw things very exact, but they lack their own sense of style. I am kind of the other way. I have limited techniques that I use on every painting, but they are my own. If you look at one of my paintings you will know that I painted them due to my style, and not someone else.
I admit, I do like to paint coral reefs. I think they give me a great excuse to go crazy with the paints. When people look at coral reef paintings they expect lots of color and energy, and I'm more than glad to give them that.
Here's some that I have painted recently.
"Lost Anchor"
It started out as a painting called, "Goth Night at the Coral Reef." I called it that due to the very abstract colors I choose for it. I had painted the background, and was really happy about it, and then nothing. I couldn't decide on what I wanted to do with it. I then put it away for 6 months. After a while I decided it needed a rusty anchor in it. Most paintings in the impressionist style are best seen at a distance of 10 or more feet. So posting a picture of it on the internet makes it kind of hard to view. It does look a little odd when you are 2 feet from the image on your screen, but in real life this looks pretty good.
The next painting I did was called, "My Brain Corral is Smarter Than Your Brain Coral."
This picture was taken after I added the background.
This next picture is after I added the coral.
And here is the finished painting.
I do have to give credit to my Girlfriend. She painted the Angelfish. I wanted something nice and neat to contrast with the sloppy painting.
And by that, I mean I think I have found my niche. I am not a terrible artist. I am a sloppy artist. And I don't mean that in a bad way. I mean that when I paint sloppily and don't think much about what I'm doing, it turns out great. When I try to be precise, it turns out horrible. So by slinging paint and being sloppy, I am actually being a better artist. I am okay with that.
I will say this, I think my techniques are getting more refined so I can take what's in my head, and put it on the canvas a little better. I feel really excited about my next painting. I think it will turn out pretty good.
Labels:
art,
artist,
Arts and Crafts,
Awesome,
Awful,
bad art,
coral reef,
corral reef,
crafts,
Fish,
terrible art
Location:
Lutz, FL, USA
Friday, July 13, 2012
Vacation Day: The Arts and Crafts Festival at Ripley, W.V., Part 3
Well, at this point at the Arts and Crafts I was feeling pretty good. I got to act like a kid, and play with the baby goats at the petting zoo. Next, I wandered around some more.
There was this nice woman selling jewelry. I didn't care so much about that, but I did care about this old chest she was displaying her items on. I took lots of pictures of it in case I wanted to build one like it. Seriously, it looked older than my two Grandmas put together.
Oh, that guy who won the ribbon for one of his dulcimers? He has some more for sale.
There was this stone carver who was just awesome. But so where his prices. I should have faked being a Free-Mason to him.
They had some neat spinning things. The video I took of it was pretty neat. Well, neat for a windy day I guess.
The longest serving U.S. Senator in history is Robert Byrd. He was also known for his fiddle playing. Here's a picture of his album and his fiddle.
Speaking of music. There was this great Appalachian band playing traditional mountain music. Here they are playing, "Blue Moon of Kentucky."
So that's my trip. I wish I could have taken more pictures, but the family was wanting me to hurry it up so they could go back to Grandma's house. I wish it hadn't of rained. A lot of the vendors packed up or didn't show because of the rain. But overall, I'm glad I went.
There was this nice woman selling jewelry. I didn't care so much about that, but I did care about this old chest she was displaying her items on. I took lots of pictures of it in case I wanted to build one like it. Seriously, it looked older than my two Grandmas put together.
Oh, that guy who won the ribbon for one of his dulcimers? He has some more for sale.
There was this stone carver who was just awesome. But so where his prices. I should have faked being a Free-Mason to him.
They had some neat spinning things. The video I took of it was pretty neat. Well, neat for a windy day I guess.
Here's a cello that a local West Virginian artisan made.
Speaking of music. There was this great Appalachian band playing traditional mountain music. Here they are playing, "Blue Moon of Kentucky."
So that's my trip. I wish I could have taken more pictures, but the family was wanting me to hurry it up so they could go back to Grandma's house. I wish it hadn't of rained. A lot of the vendors packed up or didn't show because of the rain. But overall, I'm glad I went.
Labels:
art,
artist,
Arts and Crafts,
Awesome,
Festival,
Ripley,
West Virginia
Location:
Ripley, WV, USA
Subscribe to:
Posts (Atom)