Showing posts with label craftsman. Show all posts

Saturday, March 9, 2019

The Birdhouse Community Apartments

If you're a regular reader you know that I've had a birdhouse out in the backyard for a while.  I've actually had pretty good success with it.  Or, should I say, the birds have.  It was brought up that there could be more than one birdhouse around the property.  I thought, "That's awesome!  Let me get on that!"

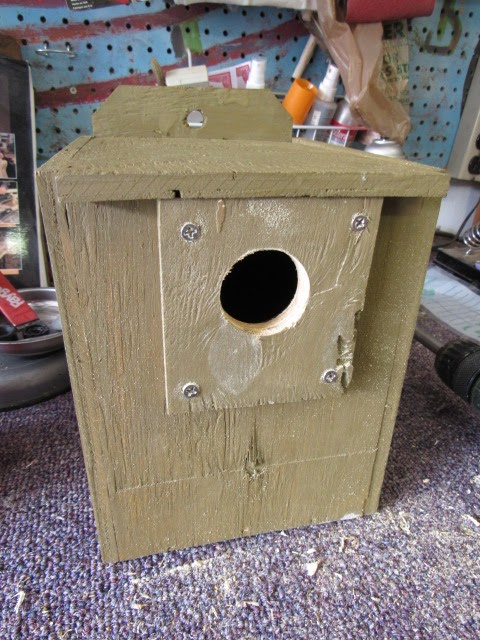
So, it was time to put up more birdhouses.  Four new birdhouses were delivered to house.  Two of the houses were bluebird houses, one was a parakeet house from the pet store, and one was a finch house.  It was decided that I would paint the two bluebird houses and the parakeet house.

First up, I drilled holes in the bottoms of the birdhouses.  If any rain would happen to get in, the holes would let it easily drain.  I also drilled holes to allow airflow and for wire to go through.  I wanted to use wire instead of drilling holes in the trees.

My photos start right after I had applied the first layer of paint.  I used an oil enamel paint that would withstand all the weird weather we get here in Florida.


There was a really interesting article on the internet about making barriers for birdhouses.  The barriers help keep out squirrels.  I thought, "I can make one using plywood and a forester drill bit."

First up, I cut the plywood into their appropriate shapes.  Then, I painted them with the oil enamel paint.


Next up, I finished painting the base coat for the three birdhouses.


After that, I drilled the wooden barriers over the entrance holes of the birdhouses.


Now the fun part, it was time to break out the forester bit, and drill the entrance hole.


Of course, I had to touch up the paint.  So I had to open up the can of paint again, and get to painting.  Once I was finally finished with the oil enamel paint, it was time to get to the fun part.  That's when I camouflage the birdhouses to blend into oak trees.  I use three spray paint cans to achieve the camo look.


When I first tried this technique I thought I needed a lot of green.  I was wrong.  I'm trying to blend into the oak tree bark which is more gray.  So I lightly spray black paint followed by a bit of brown.  The real trick is to use a light almond type of paint.  Blending the three colors makes the birdhouses look like a distressed gray color.  How well does it blend in?  Take a look.


Not bad, huh?  So now it was time to hang the first bluebird house.  There is a place on the property that birds like to hunt for bugs.  So I put the house in the oak tree right over top of the bug hunting territory.


Alright! Mission accomplished!  Now we move to the finch house.  I ended up hanging it near the bluebird house.


I didn't want to put the parakeet house near the other houses.  So I ended up putting it on the opposite corner from my original parakeet house.  I made a trip to Ace Hardware to pick up some supplies.  I ended up buying a 10 foot metal pole.  I also bought a bolt, nut and washer to attach the house to the pole.

I dug a three foot deep hole, and then managed to shove the pole into the ground another foot.  So, all in all, the pole was four feet deep.  I felt pretty good knowing it wasn't going to go anywhere.


Finally, there was just the one bluebird house left.  It was decided that it would be hidden in an Anise bush.  Can you spot it?


Let's look a little closer.
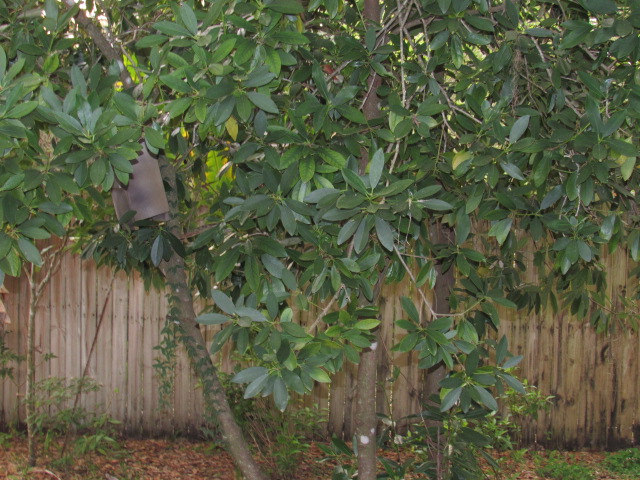

Closer.


I told you that I could paint a great camo pattern.  


So now there are five total birdhouses on the property.  I know what you're asking, "Have any birds moved in yet?"  Well, stay tuned!  There will be another blog post detailing the happenings around the yard.  

Sunday, February 10, 2019

The Tenor Guitar Project: Part 4


Next up on my to-do list for the guitar was to cut the F-holes.  I've always hated doing this part for a few reasons.  First, spruce wood is such a straight grain that it will split easily if you cut it wrong.  Second, I have a really crappy jigsaw cutter.  I don't use one enough to justify buying a higher end one.  So I have to work with what I have.  

First up I drilled holes where I could put the jigsaw blade.  I also put them in places where I would want to turn the wood around easily.  So we'll make a long story short, and say, "Boom, they came out this way."  Actually they needed a lot of sanding, cutting, filing, and worked on with various Dremel tools.  


They are definitely not perfect, but this is a blues tenor guitar.  It's supposed to have mojo.  My next job was to cut the holes for the pickups, but before I could do that I had to make sure where the bridge was going to be placed.  

Onto the template!


So I have everything laid out perfectly, and of course, that's when you run into trouble.  You see, I had put such a curve on the top plate the bridge didn't want to fit.  So I shortened the width of the bridge, and reshaped the bottom of it.


I'll admit, I may still need to fine tune it a bit later.  As you can also see in the photo above I marked (with an X) where the most pressure would be pressed on the top plate.  It is important that I mark it so I know where to put my bracing underneath.  

So now, I marked my X bracing on my template, and drew the where the pickups will go.  


As you can see I cut the holes for the pickups out with my trusty scalpel.  Now it came time for me to mark out where the pickups go on the top plate.  


It was time to once again use my trusty mini router.  This thing is such a life saver.


And it came out pretty good.


The pickup fits right in the hole.  So now I do the same thing for the bridge pickup.


It's almost perfect.  You see, the pickup rings are flat, and the top has a heck of an arch to it.  So I am going to have to design pickup rings for the flat pickup rings to sit onto.  The ones I will design will have a inside curve to them so they will sit flush with the body.  It will also help bring the pickups closer to the strings.  

The neck on this guitar is designed like an archtop guitar so it sits up a little higher.  The bridge is also high up, so that means I was always going to need high pickup rings to bring the pickups to their correct height.  

Now it was time to add the X bracing.  In this photo I have already rough cut the bracing beams.


My next step was to draw out where the bracing should go.


I already cut the bracing into shape and am dry fitting it.


Next up it was time to glue.


After a bit it was time to start on the other bracing beam.  


As you see I had to cut the beam in half.


Again, I cut the brace into shape and then dry fitted it.


Now it was time to "Give em' the clamps!!!"


And I perform the same steps for the other side of the brace.  I cut and dry fit it.

Then it's time to glue it up and clamp it.


Let me give it 48 hours to dry, and I'll get back to it.  

So that's where I am so far.  I'm moving right along with this project.  Stay tuned for more blog posts about it.