Showing posts with label painting. Show all posts

Saturday, February 15, 2020

House Repair, Err, Actually Bird House Repair

A year and a half ago I put up a number of birdhouses around the property.  I've actually written quite a few blog posts about them.  I was really proud of the work I completed.  Not only did I customize them with "Squirrel Guards," I also made sure there were drainage holes for water.

And to absolutely make sure they would last, I painted them with enamel paint.  Next, I used enamel spray paint so the birdhouses would match the colors of an oak tree.  Honestly, I went all out for those houses.

So it made me pretty angry when I found the roof tore off of one.  Well I decided to do something about it.  I was going to make a new roof, but when I went to take the birdhouse down, I found the roof sitting inside the house.

Then, a Cuban Tree Frog jumped up out of the house, hitting me in face, causing me to fall off my ladder.  I really hurt my left toe falling.  But after I felt a little better, I took the birdhouse to my workshop.  I made sure to take lots of photos of the repair.  I'll explain my work as I show the photos.

So here's the birdhouse and roof on my bench.


It's not in that bad a shape.  The wood was a little warped, but other than that it's alright.  Let's take a peek inside to see if there's anything wrong with it.


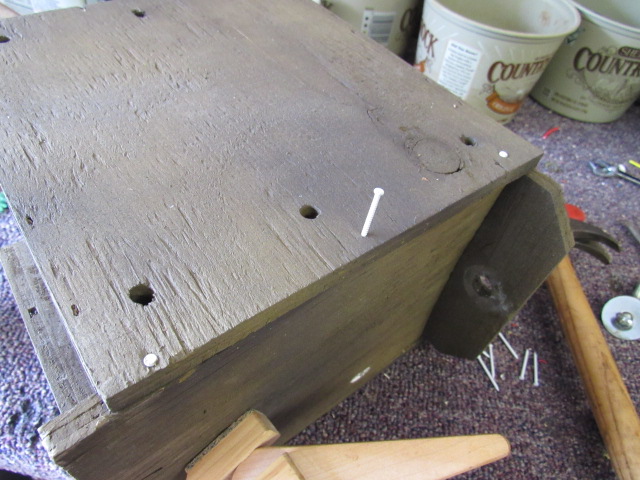
No, it's just a little dirt.  I decided to use some "helping hands" in the form of clamps.  They held the top on while I nailed the roof down.


I found these awesome tiny white finish nails in one of Dad's parts buckets.  They were perfect for this job.


And here she is, as good as new.


Now it was time to put the birdhouse back on the pole.


Now that I've fixed the birdhouse I'm hoping to have a pair of birds nest in it this spring.  If not, I'm sure the Cuban Tree Frogs will hang out in there.  They will bide their time until I walk by, jumping with all their might, smacking me right on the forehead.  

Sunday, November 6, 2016

Hunting Season: Time To Paint The Treestand

Every year hunting season sneaks up on us.  In fact, this year we aren't even going on the quota hunt.  Since everyone's schedule opens up during Thanksgiving, we decided to go for a few days then. 

But every year it's a rush.  Oh goodness, we need to check the tires on the trailer for dry rot!  Oh no, we haven't practiced shooting a gun in two years.  Oh, where are all the cooking items, coolers, maps, licenses, etc.

I did happen to remember one thing I needed to do.  I needed to paint my treestand.  I've had it for a while, and it's gotten chipped and dinged up over the years.  I just don't want the places that have been chipped to reflect sunlight.  That would definitely give away my position. 

I've found that the most important thing about painting treestands is breaking up the pattern.  You could use the classic black, brown and green colors, but if the pattern isn't broken up, you are going to stand out. 

As far as color, I try to paint my stand in a mud and leaf type color.  I put my tree up in various types of trees; oaks, pines, palms, and maples.  All of them are a little different in color.  So I aim for a background of black and green, and then break it up with lighter colors. 

Here are the after photos.  If the paint looks glossy, it's because it is still wet. 


The piece on the left is where my feet go.  The piece on the right is where I sit. 


It's a little muddy in color.  I also tried to get it close in color to a pine tree.


Here you can see the backpack straps.  That's one nice thing about this treestand.  It folds up, and I can carry it on my back.  I actually used some orange to make it look like I have moss and lichens growing on my treestand. 


This piece has a lot of padding on it, so there wasn't much to paint.  I mainly did touch up on metal that was dinged. 


I know it's hard to tell, but the part of this piece of the treestand is where I put my feet.  Namely, the part that is facing the camera.  Since this side wouldn't be seen by anything, I didn't get too creative with it.  I just made sure the dings were covered, and broke up the pattern.


The base of this part is where it grabs the tree  (toward the bottom of the picture.)  So the paint gets roughed up the most around there.  So, I had to touch up a lot of bare metal there. 

I'll let this dry overnight, and see what I think of it tomorrow.  That's the good thing with paint.  If I don't like the job I did, I can just go over it with more paint.  However, I feel pretty good about the work I performed.  I think it's going to be just fine. 

Saturday, May 7, 2016

The "New" Little Blue Trailer, Part 1

Once upon a time, we had a little blue trailer for hauling wood and such.  But it wasn't big enough.  In fact, I wrote about it five years ago:

http://angjellockheart.blogspot.com/2011/04/little-blue-wagon.html

Here's a picture of it:


Notice the blue color?  Well that was kind of by accident.  I had white paint that I added a can of dark blue paint, and that's the color it gave me.  It was what we call a happy accident.  You see, that color blue almost glows at night.  So when we were driving down the road at night, the trailer could be seen from a half mile back. 

But Dad said the little blue trailer wasn't big enough.  He needed a trailer with dual tandems (a total set of four tires on it.)  That's right, it had to be super heavy duty.

So he bought one with dual tandems.  It was working well until a construction worker with a crane set a 4,000 pound log on it, and then pushed down with the crane.  So, it's now time to rehab, rebuild, and repaint the "new" little blue trailer.

Here's what we are dealing with:


Right now, the wood has been pulled off of it.  Namely, the wood was so banged and torn up that it needed replaced.  So here is the trailer stripped of wood, and the frame halfway painted.  It looks orange in the picture, but it is closer to Spiderman red. 

Here is the beam that was bent.  It is going to need replaced.  Hence, why it and part of the trailer have not been painted yet.


Here's the view from the back:


And here's the view from the side that still needs welded:


So this leads us to the wood.  Since the last blue worked so well, Dad decided he wanted to go with that same blue.  So we went to Home Depot, eyeballed the blue colors, and came up with the blue closest to what we had on the old blue trailer.


Heck if I can tell the difference between the two.  This time, we are doing it right.  The guy at Home Depot colored our primer the same as our paint.  So I am putting both primer and paint down on the wood.  Now, the wood on the upside will get torn up, but it will be protected from water damage on the underside. 

As of this moment I have the primer put on all the wood.  I am letting it dry until tomorrow when I will start adding the regular paint on it. 

So there is still a lot of work to do on it.

1.  Weld the trailer in a few spots.
2.  Replace the bent beam.
3.  Continue with the red paint after all the metalwork is complete.
4.  Continue painting the wood.
5.  Install the wood into the trailer. 
6.  Somewhere in there make sure all the trailer wires are off the ground and working.
7.  Once the wood is completely installed it will probably need another coat of paint.  Since the back of the trailer gets so dinged up, it 's good to have a thicker coat of paint there. 

I will post Part 2 in a week or so once most of the work is complete on the trailer.  Stay tuned!

Friday, April 10, 2015

New Bad Art Day: Someone Lost An Anchor

I have written a number of "bad art" posts before.  Lately, I have been working on a another coral reef type of painting.  It's kind of my thing.  I named this one, "Someone Lost An Anchor."  Namely, because it looks like someone lost an anchor. 


And here it is:


Like almost all of my paintings this one has a lot of layering.  I would paint for about 15-20 minutes, and then let it dry.  I would come back the next day and do the same.  So it took me about a week to complete it. 

Like a lot of my paintings, there are some things I like about it, and some things I don't.  But each painting is a learning process.  One thing I do like is just how "thick" the painting looks in real life.  I really do like to build up a lot of paint on the canvas.  The one thing I don't like about it is my choice of colors.  I'm not sure some of these blend well with others.

So eventually I will post another bad art day painting.  And it will most certainly be of, yet again, another coral reef.  Stay tuned and keep reading.

Wednesday, September 17, 2014

Falling in Autumn

I decided to paint a "Fall' painting.  I also decided to paint it Bob Ross style.  Really fast, and lots of paint.  I'm still undecided on it.

The first picture is with a flash.  The second one is without one.


There are things I like about it, but I think by getting in a hurry I put paint where paint didn't need to be.  I know you are supposed to look at paintings at least 10 feet away, so looking at them on the computer kind of defeats that point. 

I don't know.  I was happy with it, but the more I look at it, the more I am unhappy with it.  Maybe I should add some more paint overtop of other paint? 

This reminds me of a previous blog I wrote called, "I am a terrible painter."

http://angjellockheart.blogspot.com/2012/03/i-am-terrible-painter.html

That was followed by, "I am a terrible painter, part 2."

http://angjellockheart.blogspot.com/2012/04/i-am-terrible-painter-part-2.html

Of all the funny things that was followed by, "I am a sloppy painter?"

http://angjellockheart.blogspot.com/2013/03/i-am-sloppy-painter.html

I guess the main point I was making is that, I am really bad at painting.  I'll have to think on which direction to go with this painting, even thought it is technically "finished."

Thursday, October 31, 2013

Adrian, Amateur Painter: The Front Steps, Part 2

Here's Part 1:  http://angjellockheart.blogspot.com/2013/10/adrian-amateur-painter-front-steps.html

I have been painting.  I have been painting.... a lot.  But it's something that needed done, and makes the house look a heck of a lot better.  I could spend some time talking about it, but let's just get to the pictures.


Again, it's quite a red.  It does have the tint of orange in it to look like Mario Andretti red.  My next job will be to paint the door.  Now I have to see if Lili (not her real name) wants it red or some other color.  So that will be another blog.  

Monday, October 28, 2013

Adrian, Amateur Painter: The Front Steps

Again, in a continuing series of me fixing broke stuff, I present another Amateur Painter series.  This time I am painting the front steps to my Girlfriend Lili's (not her real name) house.  I already tested out the paint primer and red paint on the back steps, and they turned out great.  So I got on a roll, and started to paint again.  (Sidenote: I'm actually starting to get good at this painting gig.)

So here's what I had to work with:


So first things first.  I put down the Kilz 2 paint primer first.  Again, I had it tinted gray so when I put the red paint on it, it wouldn't show up pink.  One thing to note.  Where there was already red paint, (in some places) I decided to not paint the primer over it.  I'll just put the red paint over it when the time comes. 

So here is the result of my hard work:


Due to the position of the sun, the photos can look a little washed out in places.  But overall, I got what I wanted painted.  Today was the perfect day to paint.  It was cool and dry, and those days don't come often in Florida.  Especially with a clear blue sky out. 

So here's the fun part.  I get to do it all over again tomorrow.  That's when I put the red paint on, and make it look really nice.  I'm not worried about the primer not being dry, as it was almost completely dry in places after only an hour.  And the other good news?  That means another great blog coming up. 

Read you then!

Thursday, October 24, 2013

Amateur Handyman: Back Step Man, Part 2

Here's Part 1:  http://angjellockheart.blogspot.com/2013/10/amateur-handyman-back-step-man.html

So when we last left the back steps this is what they looked like.


So now that the primer was down it was time to paint.  Luckily, a few months ago I got some free paint.  The story of which can be found here:

http://angjellockheart.blogspot.com/2013/05/free-is-for-me.html

So now it was time to put the red paint down.


When the paint is wet, it almost looks like Mario Andretti red.  It has a touch of orange in it.  Once it dries it starts to look a bit more like Barn red.

I am really happy with the Kiltz 2 primer, in that, it made the red paint so easy to put on.  Since the red paint was in an old can I'm not sure what kind it was, but it was free, so I took a chance.  It's been pretty nice.  Despite it's old age, it went on just fine.  I wish all painting jobs were this easy. 

I know the pictures make it look nice, but in real life it looks great as well.  In fact, it looks so nice it's kind of making the rest of the house look bad.  Will I be put to work on painting the sides of the house?  Only Lili (not her real name) knows for sure.

But I do know this.  I will be painting the front sometime in the future.  Although I am going to have to put up some serious plastic tarps and blankets.  That job may take some time.  So keep an eye out for it. 

Saturday, October 19, 2013

Amateur Handyman: Back Step Man

Yes, it's another new project given to me from my Girlfriend Lili (not her real name.)  As I've stated in the other Amateur Handyman posts, the people who lived in the house before Lili did their best to destroy the place.  So, little by little we are putting the place back together. 

In a previous post I showed how I added handrails to the back steps.  I had to do that before I painted them.  But in-between the build and the paint comes the paint primer.  We were in luck in that, the folks at Home Depot had a new converter for mixing the Kiltz 2 primer 2 gallon bucket.  Since we would be putting down red paint, we needed the primer to be a medium gray.  And they were able to do that.  It came out great.

So here's the back steps after the handrails.


Now it's time for a little paint primer.


I have to say, people either love or hate the Kiltz 2.  I love it.  It dries fast, and goes on easy.  I am excited about putting the red paint down soon.  And hey, that means I will get to post a "Part 2" for this blog.  Alright!

Thursday, September 5, 2013

Adrian: Amatuer Craftsman, The Bathroom Cabinet, Part 4

So here's the great news.  The cabinet is finished.  Lili (not her real name) finished up the details on the vines and flowers that adorn the cabinet.  We then applied a layer of wipe on poly to seal the paint. 

Here's the photos:


So now that the cabinet is ready it's time to hang it up right?  Well, not exactly.  You see, it has been decided that the bathroom needs to be painted, and it wouldn't make any sense to hang this up, and then paint.  So, we will wait until the bathroom is painted, and then we will hang the cabinet up. 

Well, that also means good news in that, I get another blog or two out of this project.  Stay tuned.  More will be coming.