So, it was time to put up more birdhouses. Four new birdhouses were delivered to house. Two of the houses were bluebird houses, one was a parakeet house from the pet store, and one was a finch house. It was decided that I would paint the two bluebird houses and the parakeet house.
First up, I drilled holes in the bottoms of the birdhouses. If any rain would happen to get in, the holes would let it easily drain. I also drilled holes to allow airflow and for wire to go through. I wanted to use wire instead of drilling holes in the trees.
My photos start right after I had applied the first layer of paint. I used an oil enamel paint that would withstand all the weird weather we get here in Florida.


There was a really interesting article on the internet about making barriers for birdhouses. The barriers help keep out squirrels. I thought, "I can make one using plywood and a forester drill bit."
First up, I cut the plywood into their appropriate shapes. Then, I painted them with the oil enamel paint.


Next up, I finished painting the base coat for the three birdhouses.

After that, I drilled the wooden barriers over the entrance holes of the birdhouses.


Now the fun part, it was time to break out the forester bit, and drill the entrance hole.


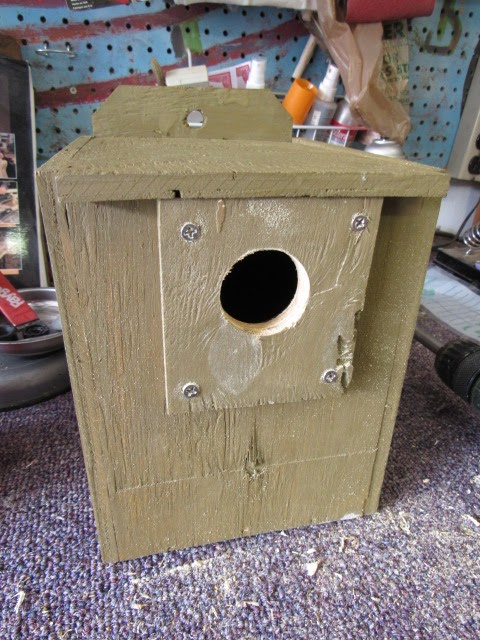
Of course, I had to touch up the paint. So I had to open up the can of paint again, and get to painting. Once I was finally finished with the oil enamel paint, it was time to get to the fun part. That's when I camouflage the birdhouses to blend into oak trees. I use three spray paint cans to achieve the camo look.


When I first tried this technique I thought I needed a lot of green. I was wrong. I'm trying to blend into the oak tree bark which is more gray. So I lightly spray black paint followed by a bit of brown. The real trick is to use a light almond type of paint. Blending the three colors makes the birdhouses look like a distressed gray color. How well does it blend in? Take a look.

Not bad, huh? So now it was time to hang the first bluebird house. There is a place on the property that birds like to hunt for bugs. So I put the house in the oak tree right over top of the bug hunting territory.


Alright! Mission accomplished! Now we move to the finch house. I ended up hanging it near the bluebird house.


I didn't want to put the parakeet house near the other houses. So I ended up putting it on the opposite corner from my original parakeet house. I made a trip to Ace Hardware to pick up some supplies. I ended up buying a 10 foot metal pole. I also bought a bolt, nut and washer to attach the house to the pole.
I dug a three foot deep hole, and then managed to shove the pole into the ground another foot. So, all in all, the pole was four feet deep. I felt pretty good knowing it wasn't going to go anywhere.


Finally, there was just the one bluebird house left. It was decided that it would be hidden in an Anise bush. Can you spot it?

Let's look a little closer.
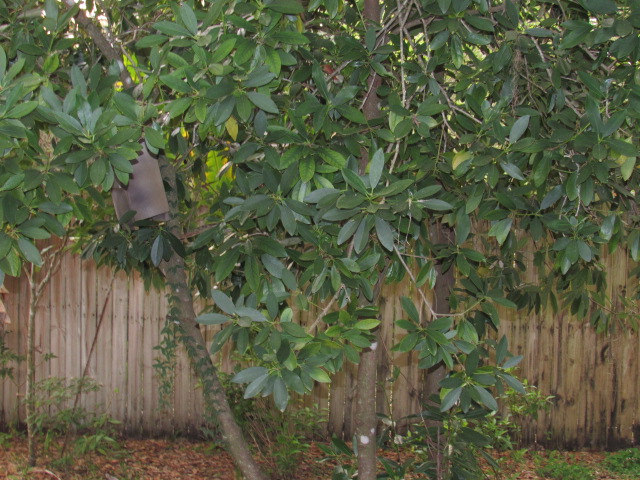
Closer.

I told you that I could paint a great camo pattern.


So now there are five total birdhouses on the property. I know what you're asking, "Have any birds moved in yet?" Well, stay tuned! There will be another blog post detailing the happenings around the yard.
No comments:
Post a Comment