https://angjellockheart.blogspot.com/2019/01/new-yearnew-project-tenor-guitar-project.html
My work on the tenor guitar project has been progressing quickly. Luckily I have been taking lots of photos to show my work on here.
In my previous post I had just glued up pieces of mahogany for the guitar body. My next objective was gluing the pieces of mahogany together. I used my planer/edger to put a nice clean and even edge on the pieces of wood. I also ran the pieces of mahogany through a thickness planer so they would be the perfect thickness.


I ended up leaving this clamped for five days. Mainly due to bad/cold weather, and the fact that I was working on other things during this time. So while the glue dried it was time to work on the top plate.
I glued the pieces of spruce together, and gave it two days to dry. Now came to the fun part. I was finally able to put a template down on the spruce, and draw the outline.


I cut the top plate out with a bandsaw, and smoothed the edges with a spindle sander.
Next it was time to start cutting the arch top. If you read or saw Robert Bennedetto's book and/or DVD, "How to build an archtop guitar," he uses this method to help guide a luthier on how to cut an archtop correctly.
I measured the edges at 1, 2, and 3 inches. I marked it with a pencil.

Next, I took the smallest drill bit I had and marked the depth using a drill press.

Next it was time to break out the hand planers.

It looks rough, but I kept at it.

Can you believe it looks like this now? Well, it took a lot of sanding to achieve this look. The good news is I managed to cut the top very proportionally. In other words, one side matches up perfectly with the other.
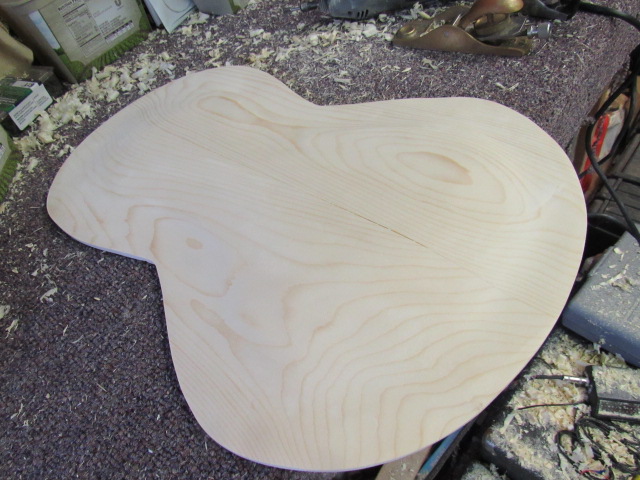
Admittedly, cutting all that wood made a heck of a mess.

Now it was time to cut out the body. First, I sanded it down smooth. Next it was time to draw out the template on the body.


The next step was to cut out the body on the bandsaw. After that I used the spindle sander to even out the edges.

It was now time to sand the body down a little more.
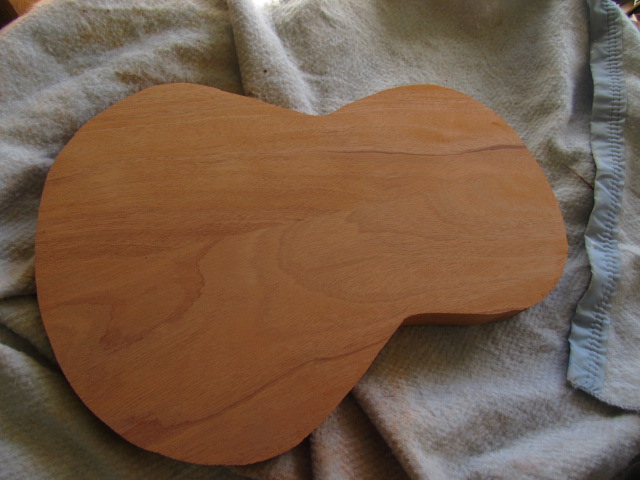
The woods' grain is really starting to pop now.
Next I flipped the body over so the inside was face up. I marked the body one inch from the edge.

Now it was time to do some serious routing. Let's just fast forward to where I am knee deep in wood shavings. Just know this step took a while.


Yeah, I was able to toss some of the shavings around the yard. This is what I am was working with after using the router.


It was now time to use a hand/palm sander on the inside of the body. That cleaned it up a bit.

And here's a shot of the top and sides. I had just sanded the sides with the spindle sander. I also used a hand sander and a hand/palm rotary sander to sand the entire body.


Please realize that for it to look the way it does a lot of sanding occurred. I know these photos may make it seem like it magically came out the way it did, but that's pretty far from the truth. A lot of time and effort were put in. And a good amount of that time I spent sanding. Thank goodness for all my mechanical sanding tools.
I managed a lot of work in a short period of time. But the work is still ongoing. Stay tuned for part three.
No comments:
Post a Comment