I have always wanted a black Les Paul Custom. Of course, I know I can't afford a Gibson, but I am more than happy with an Epiphone. So when one popped up on Craigslist I had to take a peek. It turns out I had just bought a pickup from the seller of the Epiphone a few weeks before. He was selling the guitar along with an Epiphone hard-shell case for $275.
If you check Sweetwater you can see that an Epiphone Les Paul Custom now costs $679.00 new. The hard-shell case runs $129.00. So you can see why I jumped on this deal. When I checked out the guitar I saw why he was selling it so low. The frets were all ate up. Someone had played this guitar until the frets just didn't need fret-dressed, they needed replaced.
But that's okay since guitar repair is what I do. I'd not only re-fret the guitar, I'd buff out all the pick scratches, and change out the pickups. Here's what I was working with.


My camera isn't a high end camera, but I took a photo that tried to show the pick scratches.

First up, let's take a peek at those frets. My camera actually managed to get a someone decent photo of how chewed up they were.


Next I stripped the guitar of it's body hardware and removed the pickups.


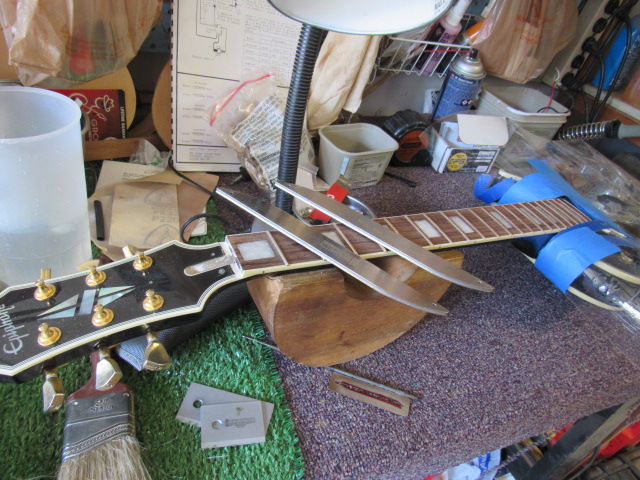
Next it was time to remove the frets.


You can see just how roughed up the wood was. There were dips in the fretboard where it had been played heavily. So now it was time to use a radius block, and then a wood planer.


I radiused the fretboard until it was nice and smooth. I should also mention that before I started sanding I made sure the neck was completely flat. In other words, I adjusted the truss rod until it was nice and flat.
After I wiped the dust off here's what it looked like.


Next up I used my curling tool to curl up my fretwire. I decided on using "Dean" style guitar wire. In other words, it's taller and wider than most fretwire. That's okay since I am going to fret-dress it which brings down the overall height.


Next up I remove the clamps, block, and rubber bands. I use my fret cutters to cut the fret-ends.


This triangle file is special since the corners are smooth. That way I can file the frets in the way shown below.


Now if I were doing this on a maple fretboard I would tape up everything but the frets. Since this is rosewood I am just going to buff the snot out of it anyway. Some luthiers would tape up the fingerboard no matter what kind of wood was used. It's really just personal preference.
Also, please notice the plastic sheet that I use to protect the body. This works great. It's much better than laying down 1000 feet of masking tape like I've seen some luthiers do.

My next step was to fret-dress the frets. I'd use my fret file to even out the frets. Once they were flat, I used my "high tech" block of wood to sand it down even finer. I attached coarse 80 grit sandpaper with duct tape, and ran it back and forth on the frets.

Next up, I used a 150 grit diamond fret file, and then a 300 grit diamond fret file. I should also mention that I use my straight-edges repeatedly throughout this step. I have to be sure that the frets are as perfectly straight as can be.
After that, I used my "high tech" homemade block of wood. This time I attached 120 grit sandpaper to my block of wood with duct tape. Again, I ran the block of wood back and forth to make sure the frets were perfectly even. Again, I am using my straight-edges throughout this step.


So next up was time to put the hardware back on, and install new pickups.

Once I installed them I had to set the guitar up. The big things to take care of were the string height, and adjusting/filing the nut slots. The intonation was perfect, and I only had to adjust the truss rod a little bit.


Next up I will be adding straplocks and a strap. Luckily I have some gold straplocks from years ago. I just never had a guitar to put them on until now. I'll end up playing this one for a while, and see how I feel about it. I'll see if I bond with it, or move it down the road. I will say I'm glad I had the chance to perform all this work on it. I think I enjoy working on them more than I do playing them these days.
No comments:
Post a Comment