The original post, http://angjellockheart.blogspot.com/2011/03/baritone-cello-guitar.html
Part 1, http://angjellockheart.blogspot.com/2011/05/ongoing-baritone-cello-tele-project.html
Part 2, http://angjellockheart.blogspot.com/2011/05/ongoing-baritone-tele-cello-project.html
Part 3, http://angjellockheart.blogspot.com/2011/05/ongoing-baritone-tele-cello-project_29.html
Part 4, http://angjellockheart.blogspot.com/2012/02/ongoing-baritone-tele-cello-project.html
Part 5, http://angjellockheart.blogspot.com/2012/02/ongoing-baritone-tele-cello-project_24.html
Part 6, http://angjellockheart.blogspot.com/2012/03/ongoing-baritone-tele-cello-project.html
So here's where I am so far. I am close. Oh so close to finishing this project. Let's go to the pictures.
In the picture below you can see that I have completed putting the lacquer on the body. I have then sanded and buffed it out.
Here I am laying the hardware out.
Here I have the pickups put in, and now I need to wire them up.
Of all the weird things, I actually got the wiring correct the first time. I have it plugged in, and all the electronics work.
Here's another shot of the body with all the hardware hooked up.
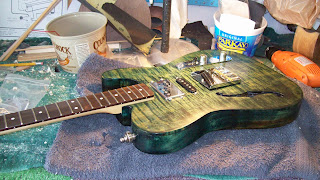
Here, the neck is dry fitted in the neck pocket.
Now comes the fun part. I realize that I have made a mistake. The neck pocket is too far to the right for some reason. I have no idea how that happened. I can't just throw this project away. I will have to find a way to do some "creative routing," and fix my screw up. This is too nice of a project to give up now.
So hopefully my next post in this series will be how I saved the day, and now have a cool, new guitar.


No comments:
Post a Comment